Inspired by seeing Xmas-themed-PCBs all over Twitter, an idea popped into my head. Two days later, I’d sent off a new PCB for manufacture.
Mostly fuelled by envy of the incredible Xmas tree PCB that Brian Lough had put together, I really wanted to get in on the action and design a festively coloured PCB that took advantage of the limited colour palette available.
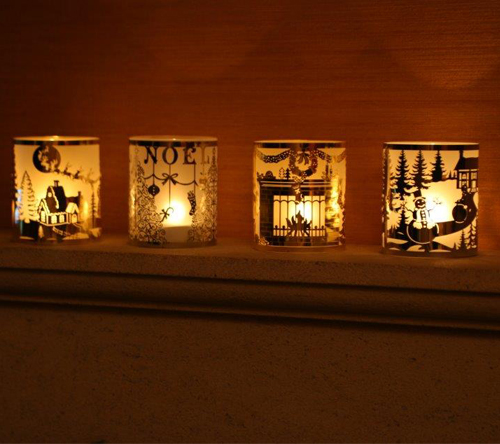
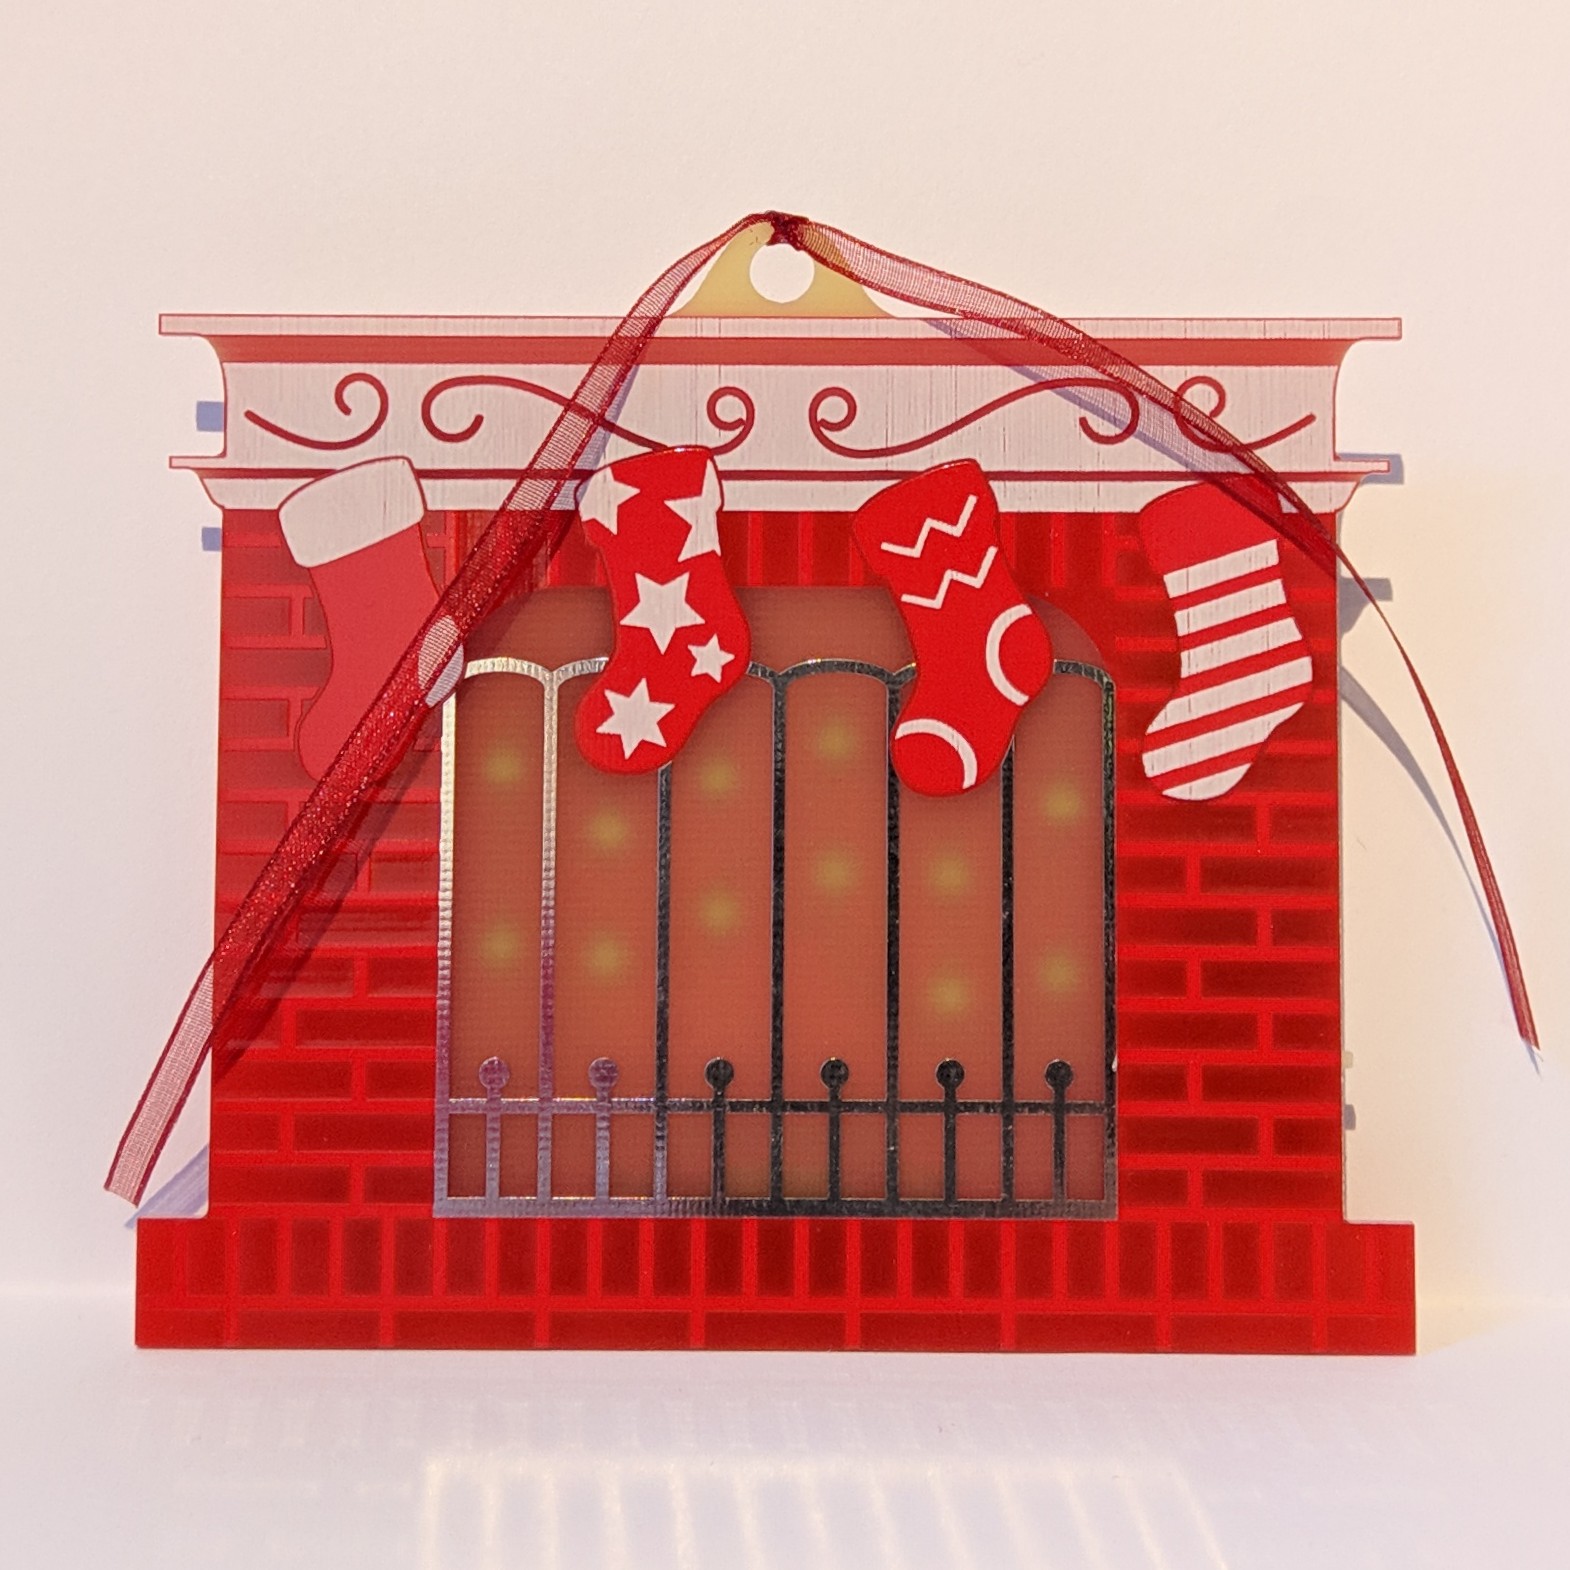
Since I was struggling for gift ideas as I usually do, I thought I’d design some nice bauble PCBs to give to family and friends as presents. However after a trawl through Google Images for inspiration there wasn’t really anything that caught my eye, until I stumbled on these tealight holders:
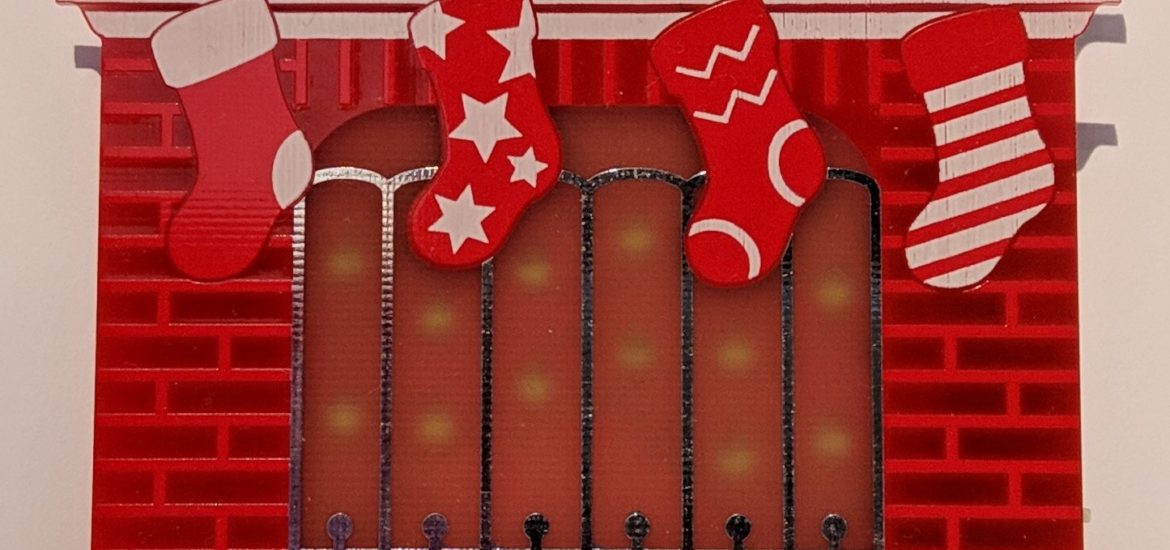
I loved the look of this festive fireplace and an idea took root. You can see my progress over on Twitter but here’s the finished design visualised in the excellent OSHPark previewer:

This is probably the quickest I’ve taken a PCB from concept to finished-design. That’s mainly because I couldn’t stop thinking about it and grabbed every free moment over a weekend to work on it. The workflow was the same as for my Skeletor badge, designing the art in Inkscape and converting it to a KiCAD board using the svg2shenzhen plugin.
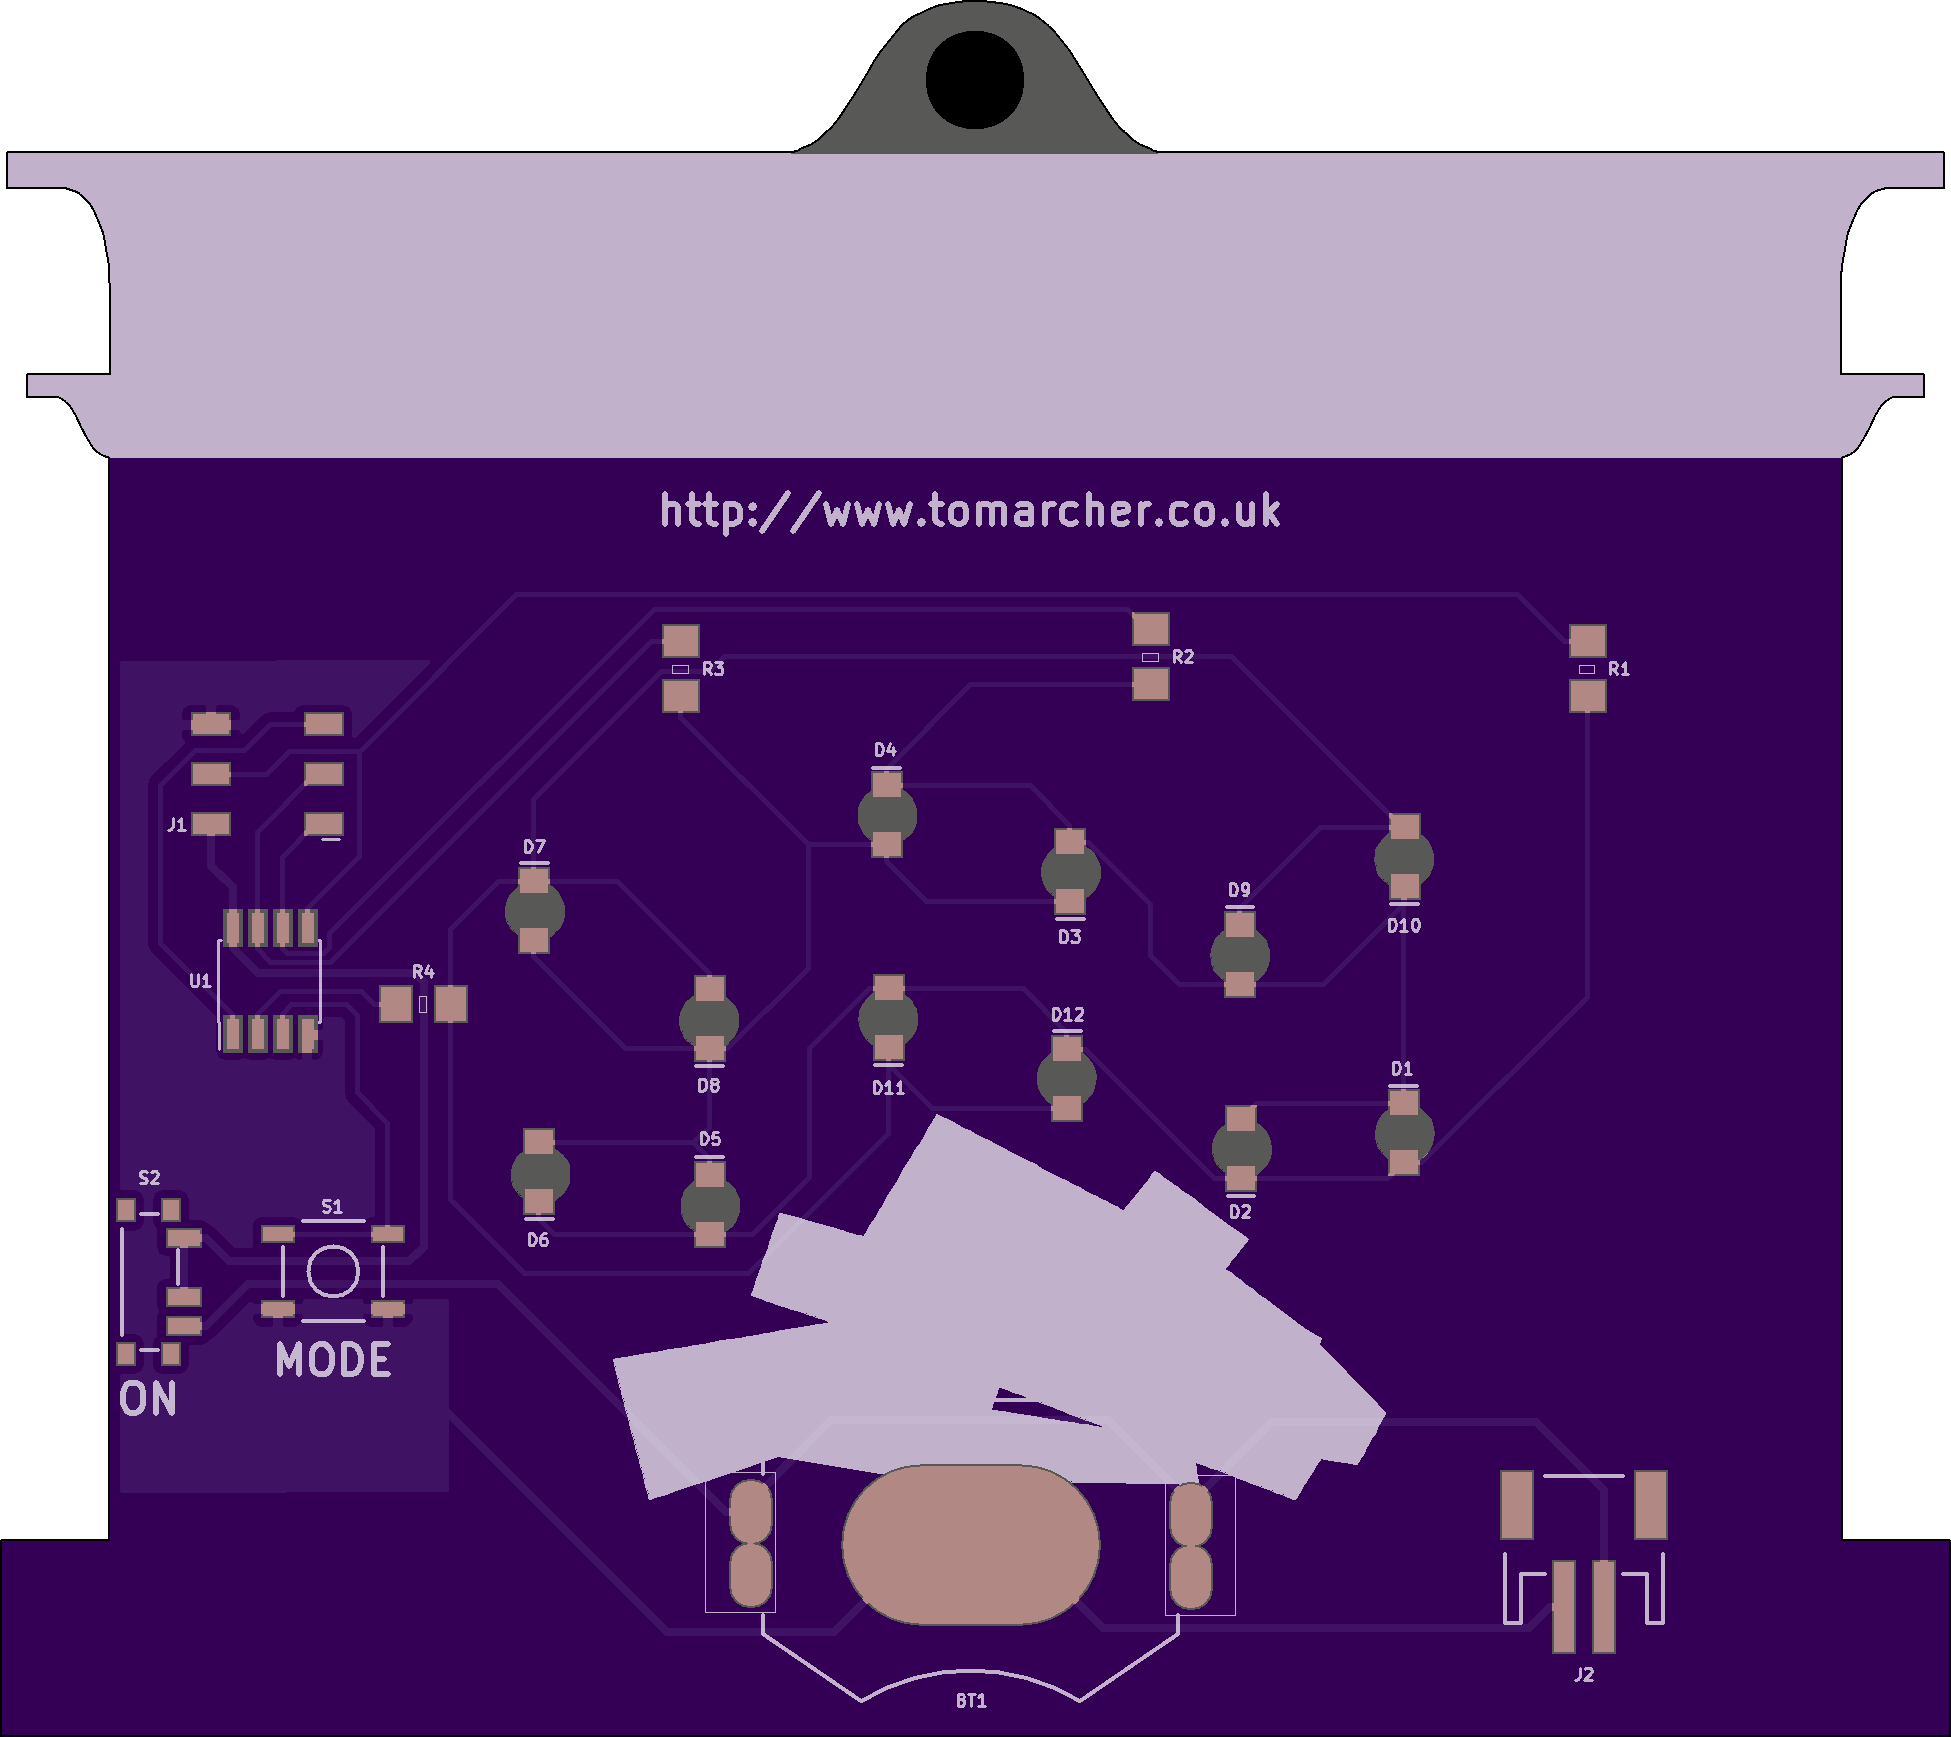
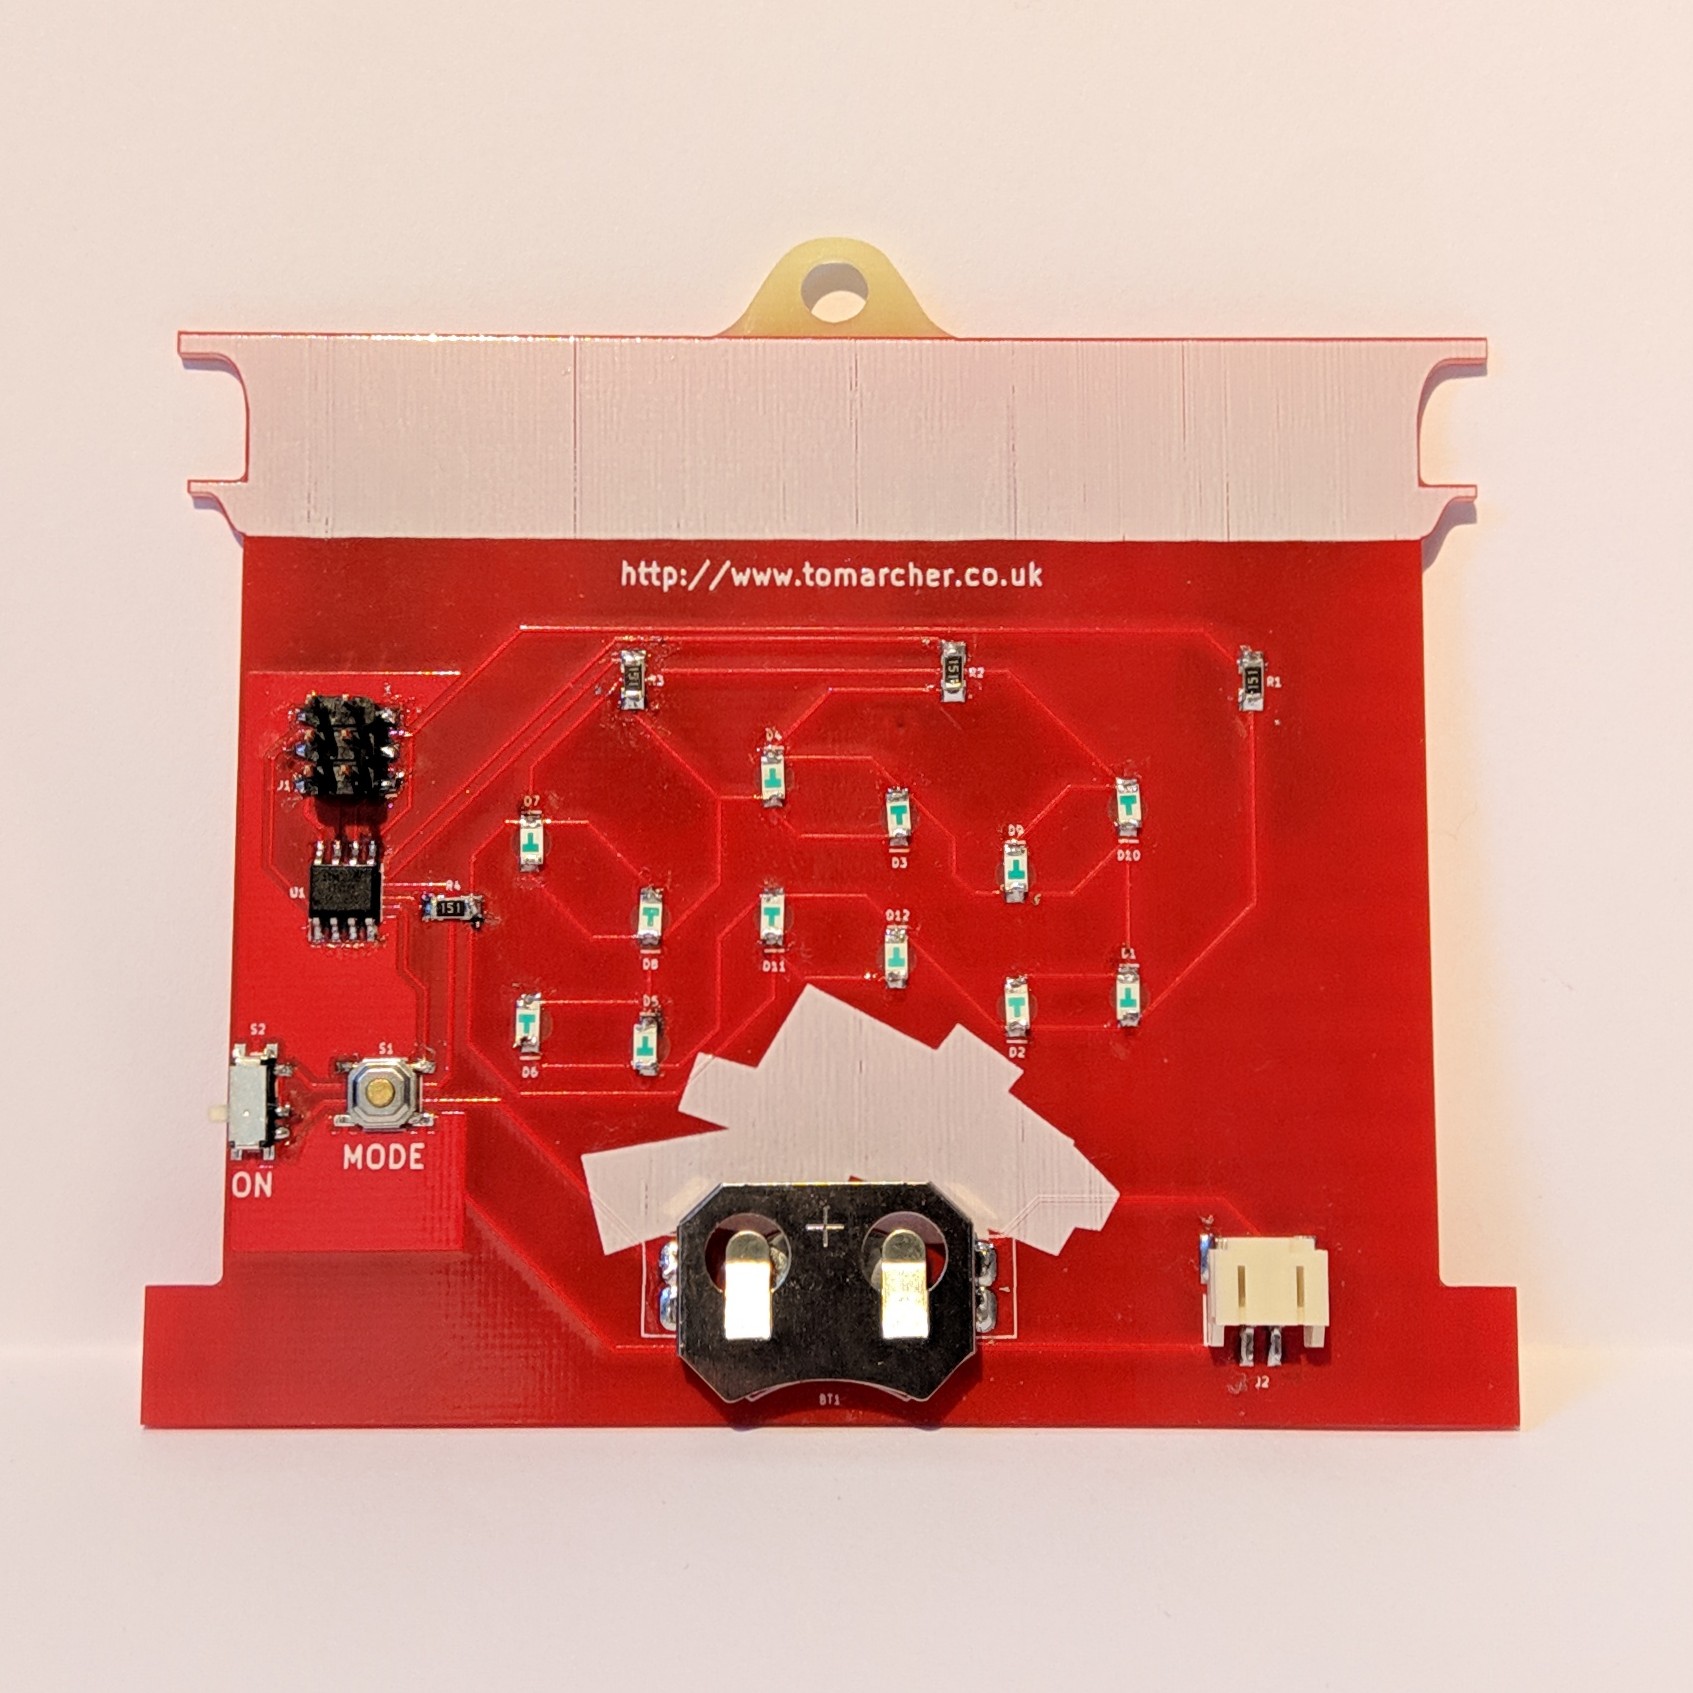
This board is essentially just a bigger version of my Clamps v2.0 badge. However this time I’ve added footprints for an actual programming header and a LiPo battery connector. RSComponents came in handy for getting these and a quantity of ATtinys to me at short notice.
Originally I was only going to add a handful of LEDs, but I ended up with 12 charlie-plexed LEDs – using up all the spare pins on the ATtiny. I happened to have a whole bunch left over from my Chronometer project which was an added bonus! The schematic was shamelessly cribbed from DaveDarko’s Sloth badge.
Brian had had some issues with his first batch of boards from JLCPCB (watermarks on the FR4 and product numbers on the wrong side) but given how well PCBWay handled the Skeletor badges I was fairly confident there wouldn’t be any problems.
Their QA team were great to work with as always, double checking my board outline was correct (I tend to leave alignment stuff outside of the board area) and they put up with me tweaking the gerber files several times. Their online chat is also super helpful, since I was able to double check where they planned to put the product number. I’m always impressed with how quickly they turn around PCBs and a week after ordering, these arrived:
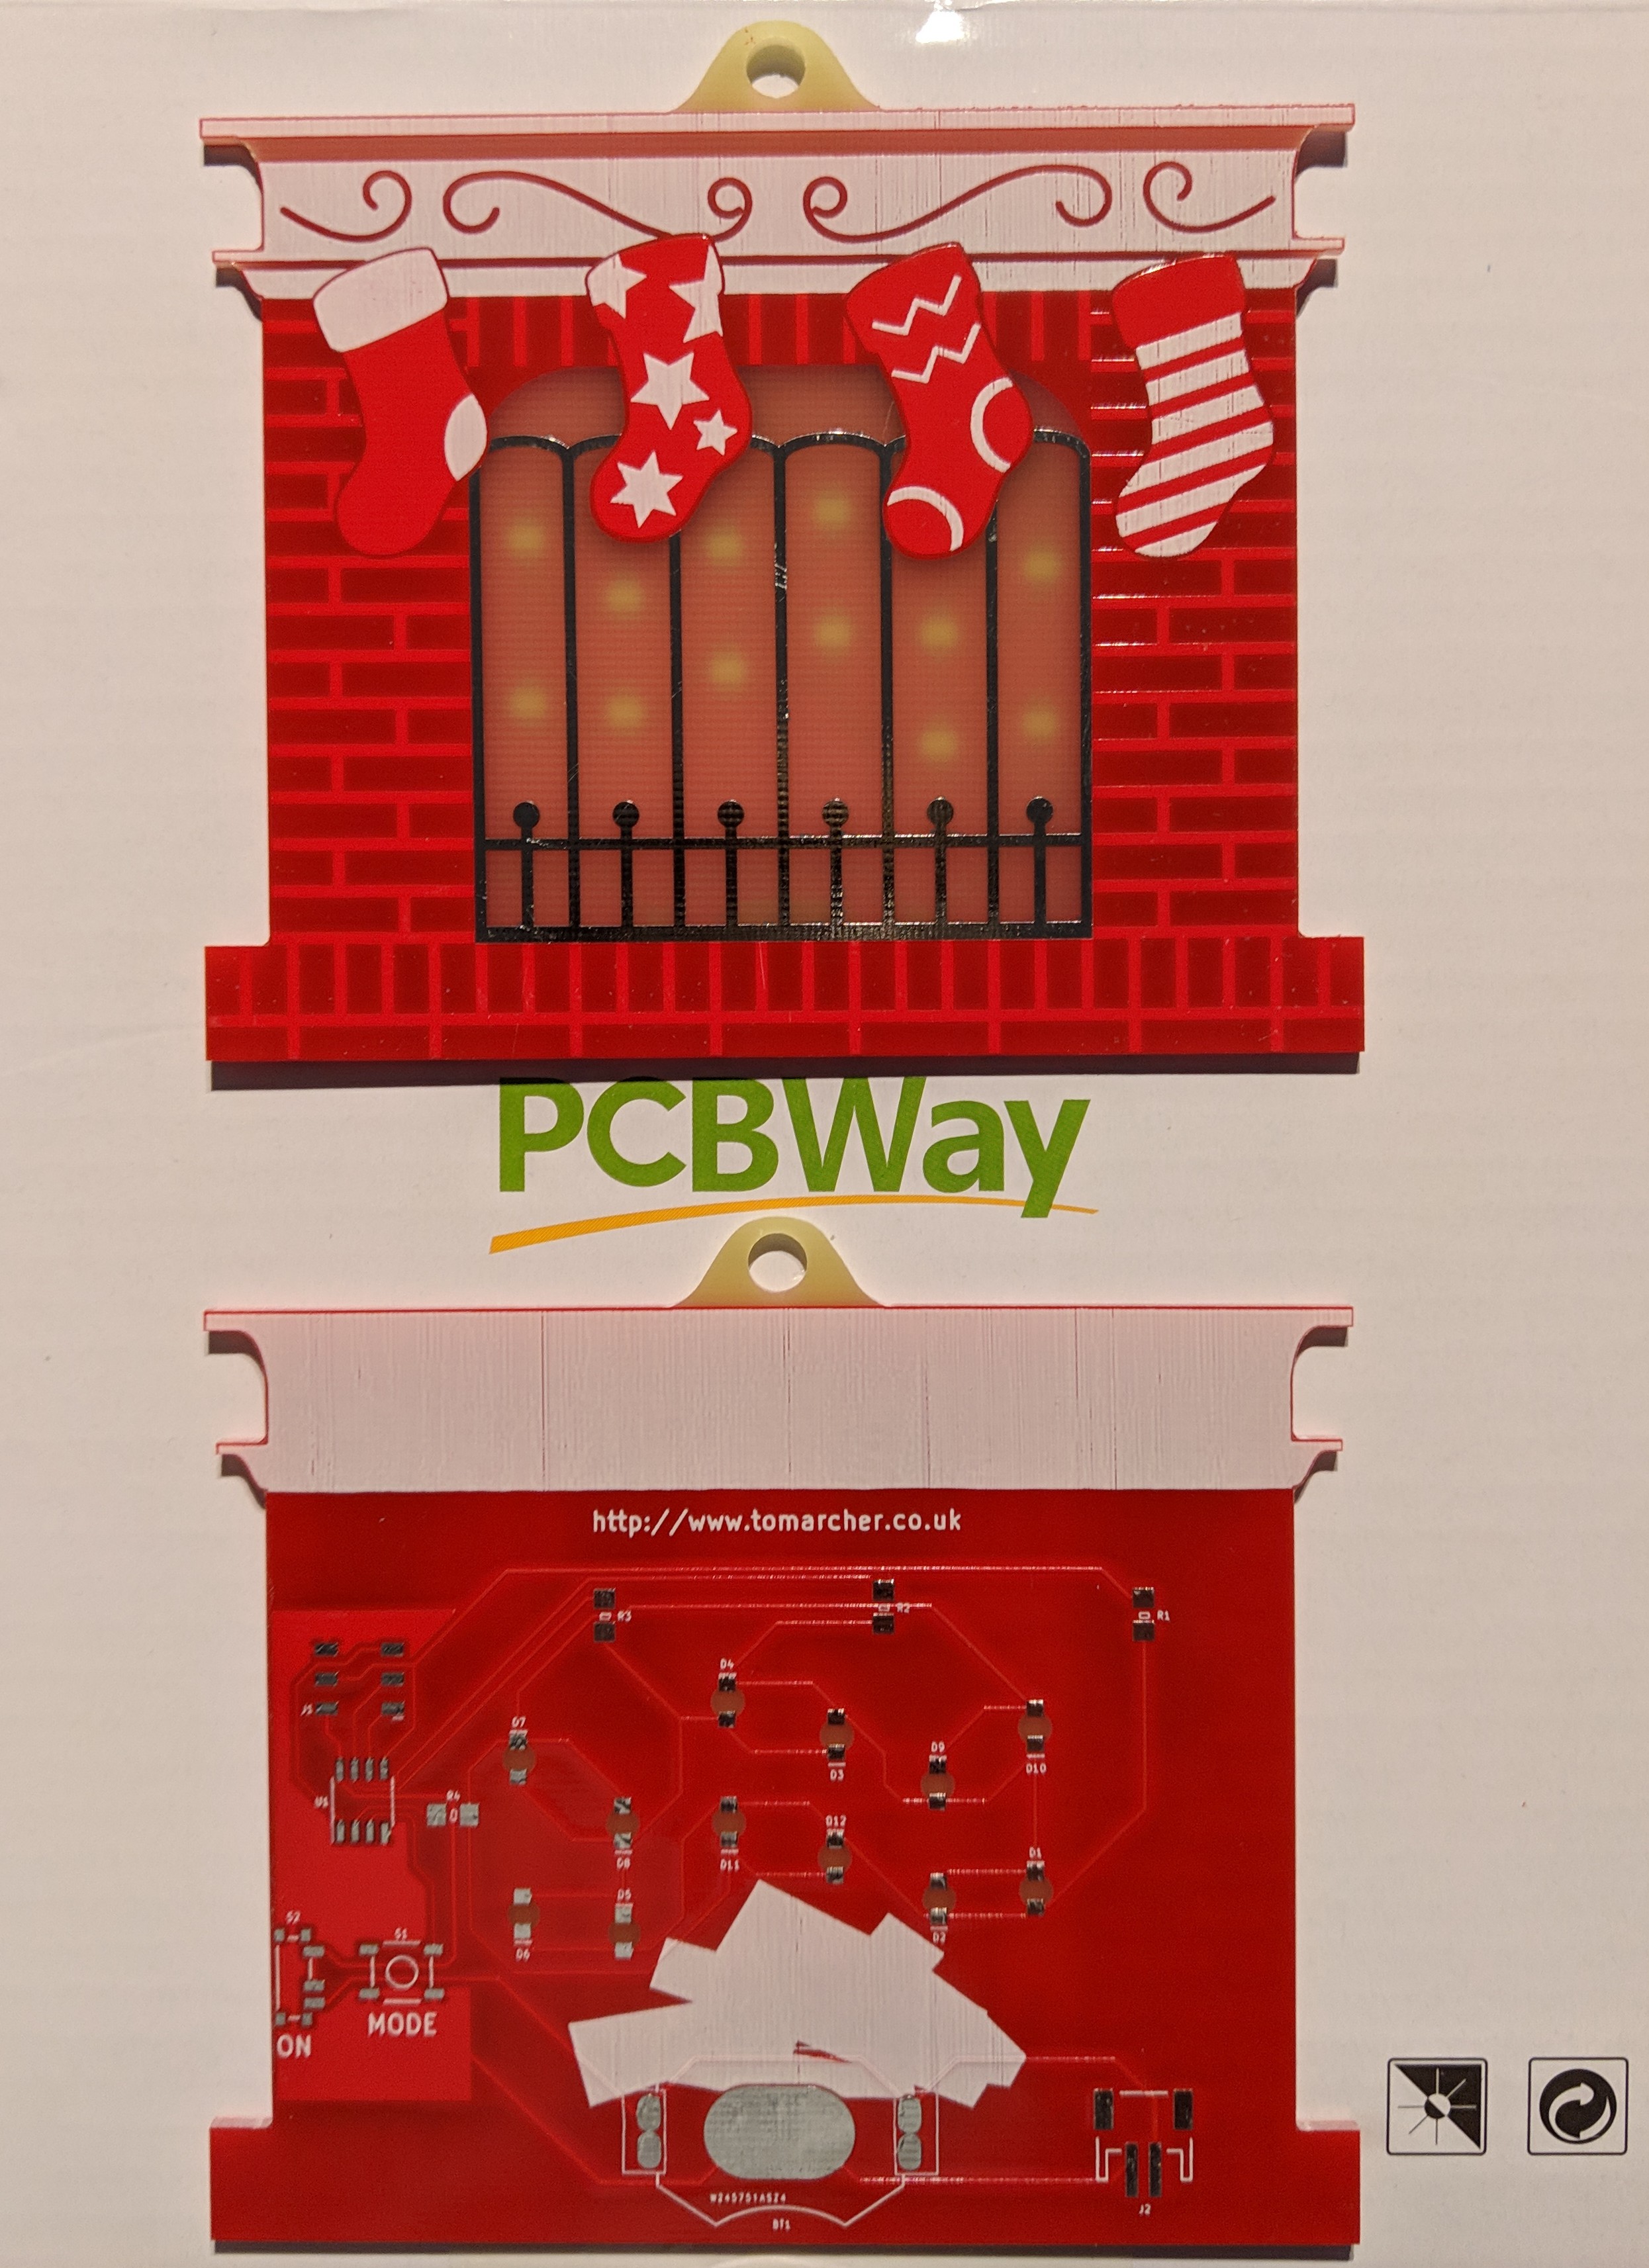
I always get nervous once I’ve submitted an order for PCBs, I seem to imagine all the ways that I could have messed something up. Apart from some of the silkscreen being a little patchy, these turned out exactly as I imagined, plus I ended up with an extra PCB on top of the 10 I ordered!
Once I had the boards in hand, I couldn’t resist getting one soldered up. The trickiest part is probably soldering the 1206 LEDs upside down, but this was surprisingly easier after switching from my fine soldering tip to my chunkier one.
For their projects Brian and Dave both used ATtiny13s, but I had grand plans for my tiny fireplace so I ended up going for the slightly beefier ATtiny25. I had some initial teething issues with my code and ended up bricking one of my micro-controllers and ruining a board trying to replace it. Note to self, check your board connection is solid before trying to burn the bootloader.
Eventually though I got something working and spent the rest of the week adding animations:
I had originally planned to add some animations that faded LEDs in and out, but dropped them in favour of some simpler ones. I may revisit these once I’ve finished the boards I’m giving as gifts.
As ever, the code is on my GitHub page. It’s similar to my Clamps v2.0 badge, using interrupts to multiplex the LEDs and updating animations using the main loop. It’s great fun figuring out a concise way to represent an animation. I need to credit Brian here for giving me the idea to add multiple speeds for each mode. Completely over-engineering the code – I also added automatic cycling of the animations when the board is initially powered on. Pressing the button pauses the cycling on the current animation after which further presses advance to the next mode.
As a result of the multiplexing, the LEDs do appear a little dimmer than normal, but even running on a 3V coin cell with 150ohm resistors they look pretty nice. The LiPo connector and programming header add a few different options for powering the board.
I scoured some local craft shops to find some festive ribbon so that the ornament can be hung from a tree. Though as I found at work this week, a LiPo battery makes for a great kickstand!
This little test run was great to work out some of the kinks with the project. Here are some things I’d change in a potential second version:
- Add a copper pour over the whole of the back side of the board. The FR4 was more translucent than expected and when viewed from the front, the right side of the board does appear slightly darker because of the copper pour on the bottom layer.
- Add some extra ‘LED circles’ to break up the areas between each LED.
- I was running short on time, so chose to re-use footprints that I’d had some experience with. But in this case a higher-profile tactile switch might have been better for the ‘Mode’ button.
- With the current LED wiring, I’m forced to use 1-in-12 multiplexing. A slightly different layout would have allowed me use 1-in-4 for brighter LEDs at the cost of more difficult routing.
- In the end the code came to 1360 bytes for the ATtiny25, it’d be an interesting exercise to try and squeeze this into an ATtiny13 at some point.
- The current header sits a little proud, a right angle programming header would solve this issue.
- Some extra labelling on the silk screen for the programming header and battery terminals would make hacking the ornament a bit easier.
Despite leaving it a bit late, I had intended to sell a few of these on Tindie, but in the end I decided I didn’t need the added stress of getting more of these soldered up. Maybe you’ll see the revision 2 board next Xmas!