It’s been a little while since I’ve posted and that’s mainly because I’ve been busy moving house. Now that’s out of the way I’ve got a bit more time for electronics projects. The first thing I’m tackling is much-needed addition to my audio setup.
I’m a big fan of vinyl and have a modest collection of records to go with my record player. Before I moved house, the record player output was connected to my PC’s speakers (via a pre-amp). This wasn’t an ideal setup as it caused a fair bit of hum on the audio. Now I’ve got a bit more space, I’m able to plug the record player into my sound bar instead. The unfortunate downside of this is that I’m unable to control the volume so it’s 11 or nothing!
After a bit of a Google it seemed like a cheap option would be to place an attenuator (volume control) between the record player and the sound bar, so I opened up KiCAD and got to designing.
Admittedly this could have all been soldered together without the need for a PCB, but I didn’t really fancy it and this approach at least gives me something solid to work with when designing the enclosure later.
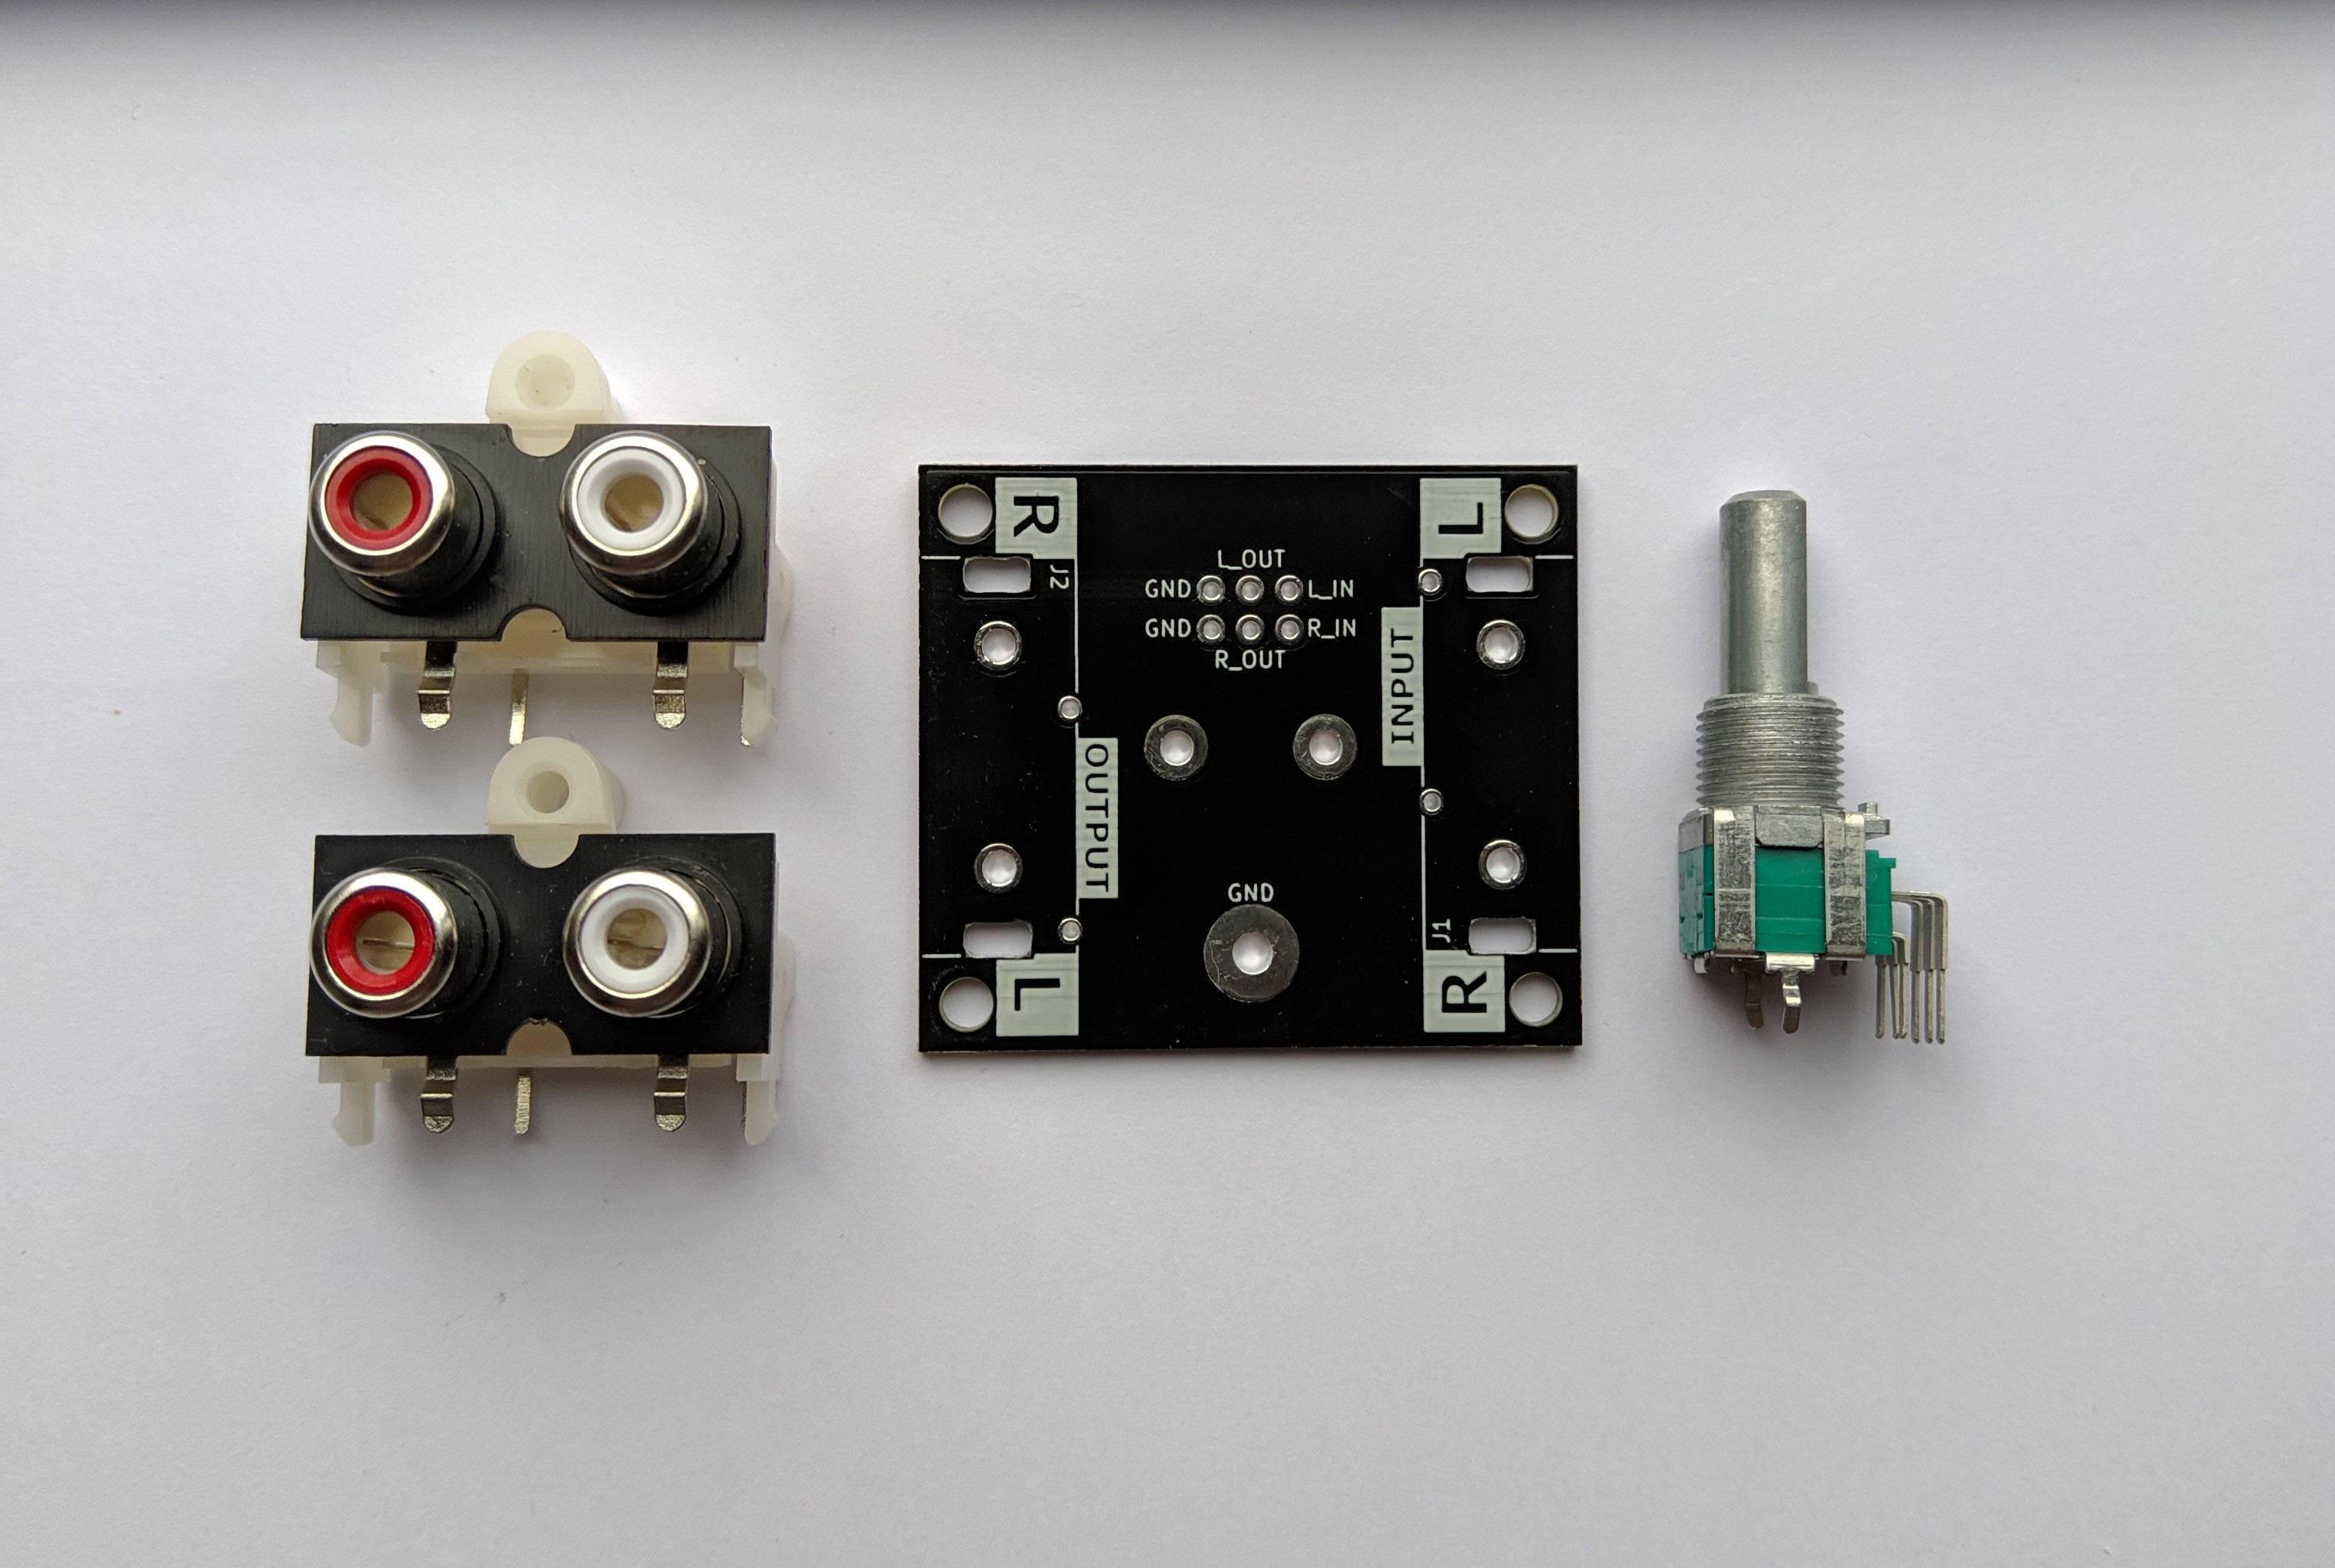
Full credit goes to this Instructable for inspiration. I replaced the BNC and 3.5mm connectors in favour of two RCA connectors and removed the now redundant switch. I had a search of RS Components for a reasonably priced stereo (dual-gang) potentiometer and found the Alps Electric RK09. Alps Electric pots come highly rated for audio applications.
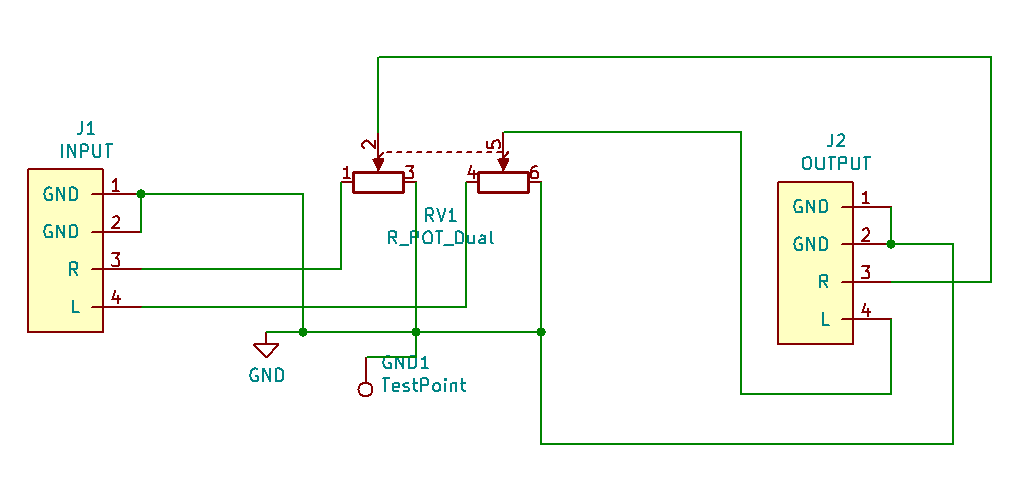
The potentiometer simply forms a voltage divider from the input signal to ground. I added a ground test point just in case the PCB needed to be connected to an external earth to remove any hum.
Most of the time was spent creating a symbol for the RCA jack as my KiCAD libraries didn’t have one. Before I could layout the PCB I also had to create the respective footprint. Fortunately I already had a jack and reference footprint in hand (from my pHAT DAC) so I cribbed some measurements from the PCB.
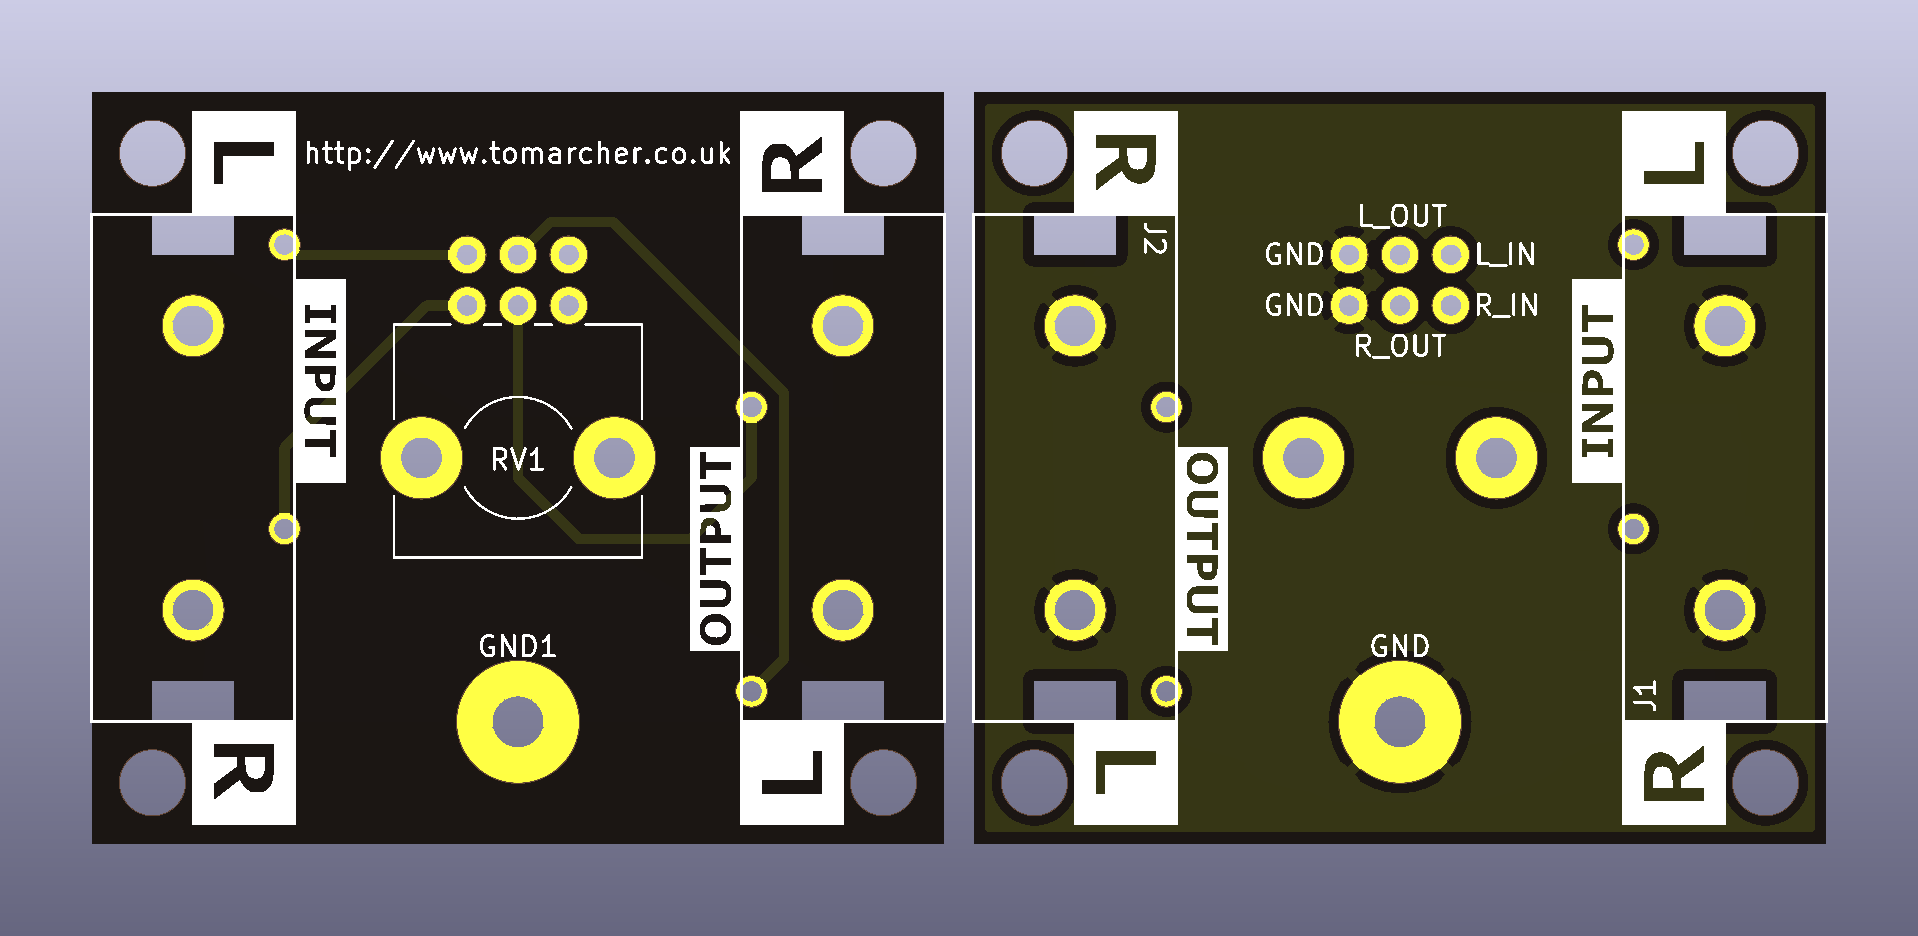
Creating symbols and footprints is still something I’m getting used to in KiCAD, but I’m slowly getting there. I again took advantage of svg2shenzhen to assist with creating some of the silkscreen labels.
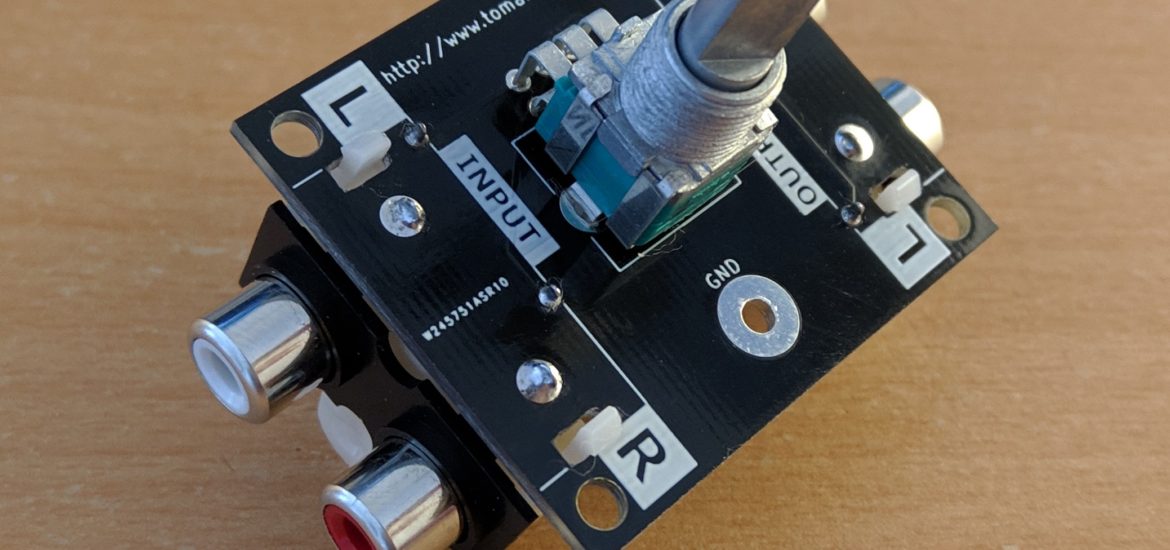
Most of the board is taken up by the two RCA jacks. I was trying to avoid using vias to route the traces which made things a little trickier. I ended up with the RCA jacks mounted on the underside of the board so as to avoid them coming into play with the top of an enclosure.
Once I’d sent the board off for fabrication with PCBWay I set about designing an enclosure to house the project. This isn’t strictly necessary as it most likely will be hidden behind some furniture, but I may have got a little carried away with this over a long weekend.
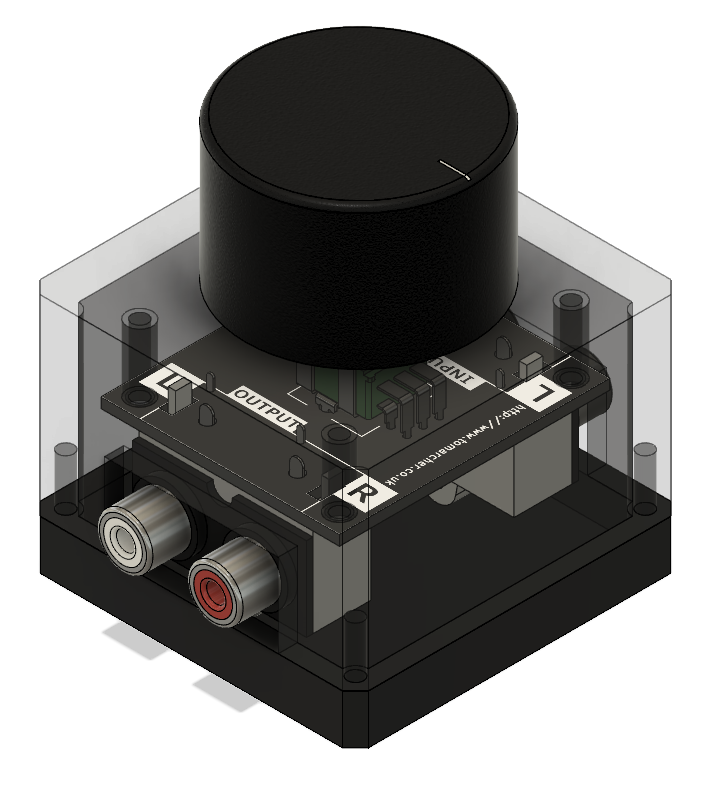
RS Components handily had a 3D model of the potentiometer which I pulled into Fusion 360 with my PCB model. I spent a bit of time modelling the RCA jack so I could get a good feel of the final dimensions of the everything assembled. A big control knob really completes the look. The case is a pretty simple design, but I’m tempted to get it printed in an exotic material – conductive PLA might help with audio interference.
Ten days after submitting the order, five PCBs arrived in the post. This was my first time designing a board with internal cutouts so I’m happy there weren’t any issues. Here’s the complete set of parts for the project.
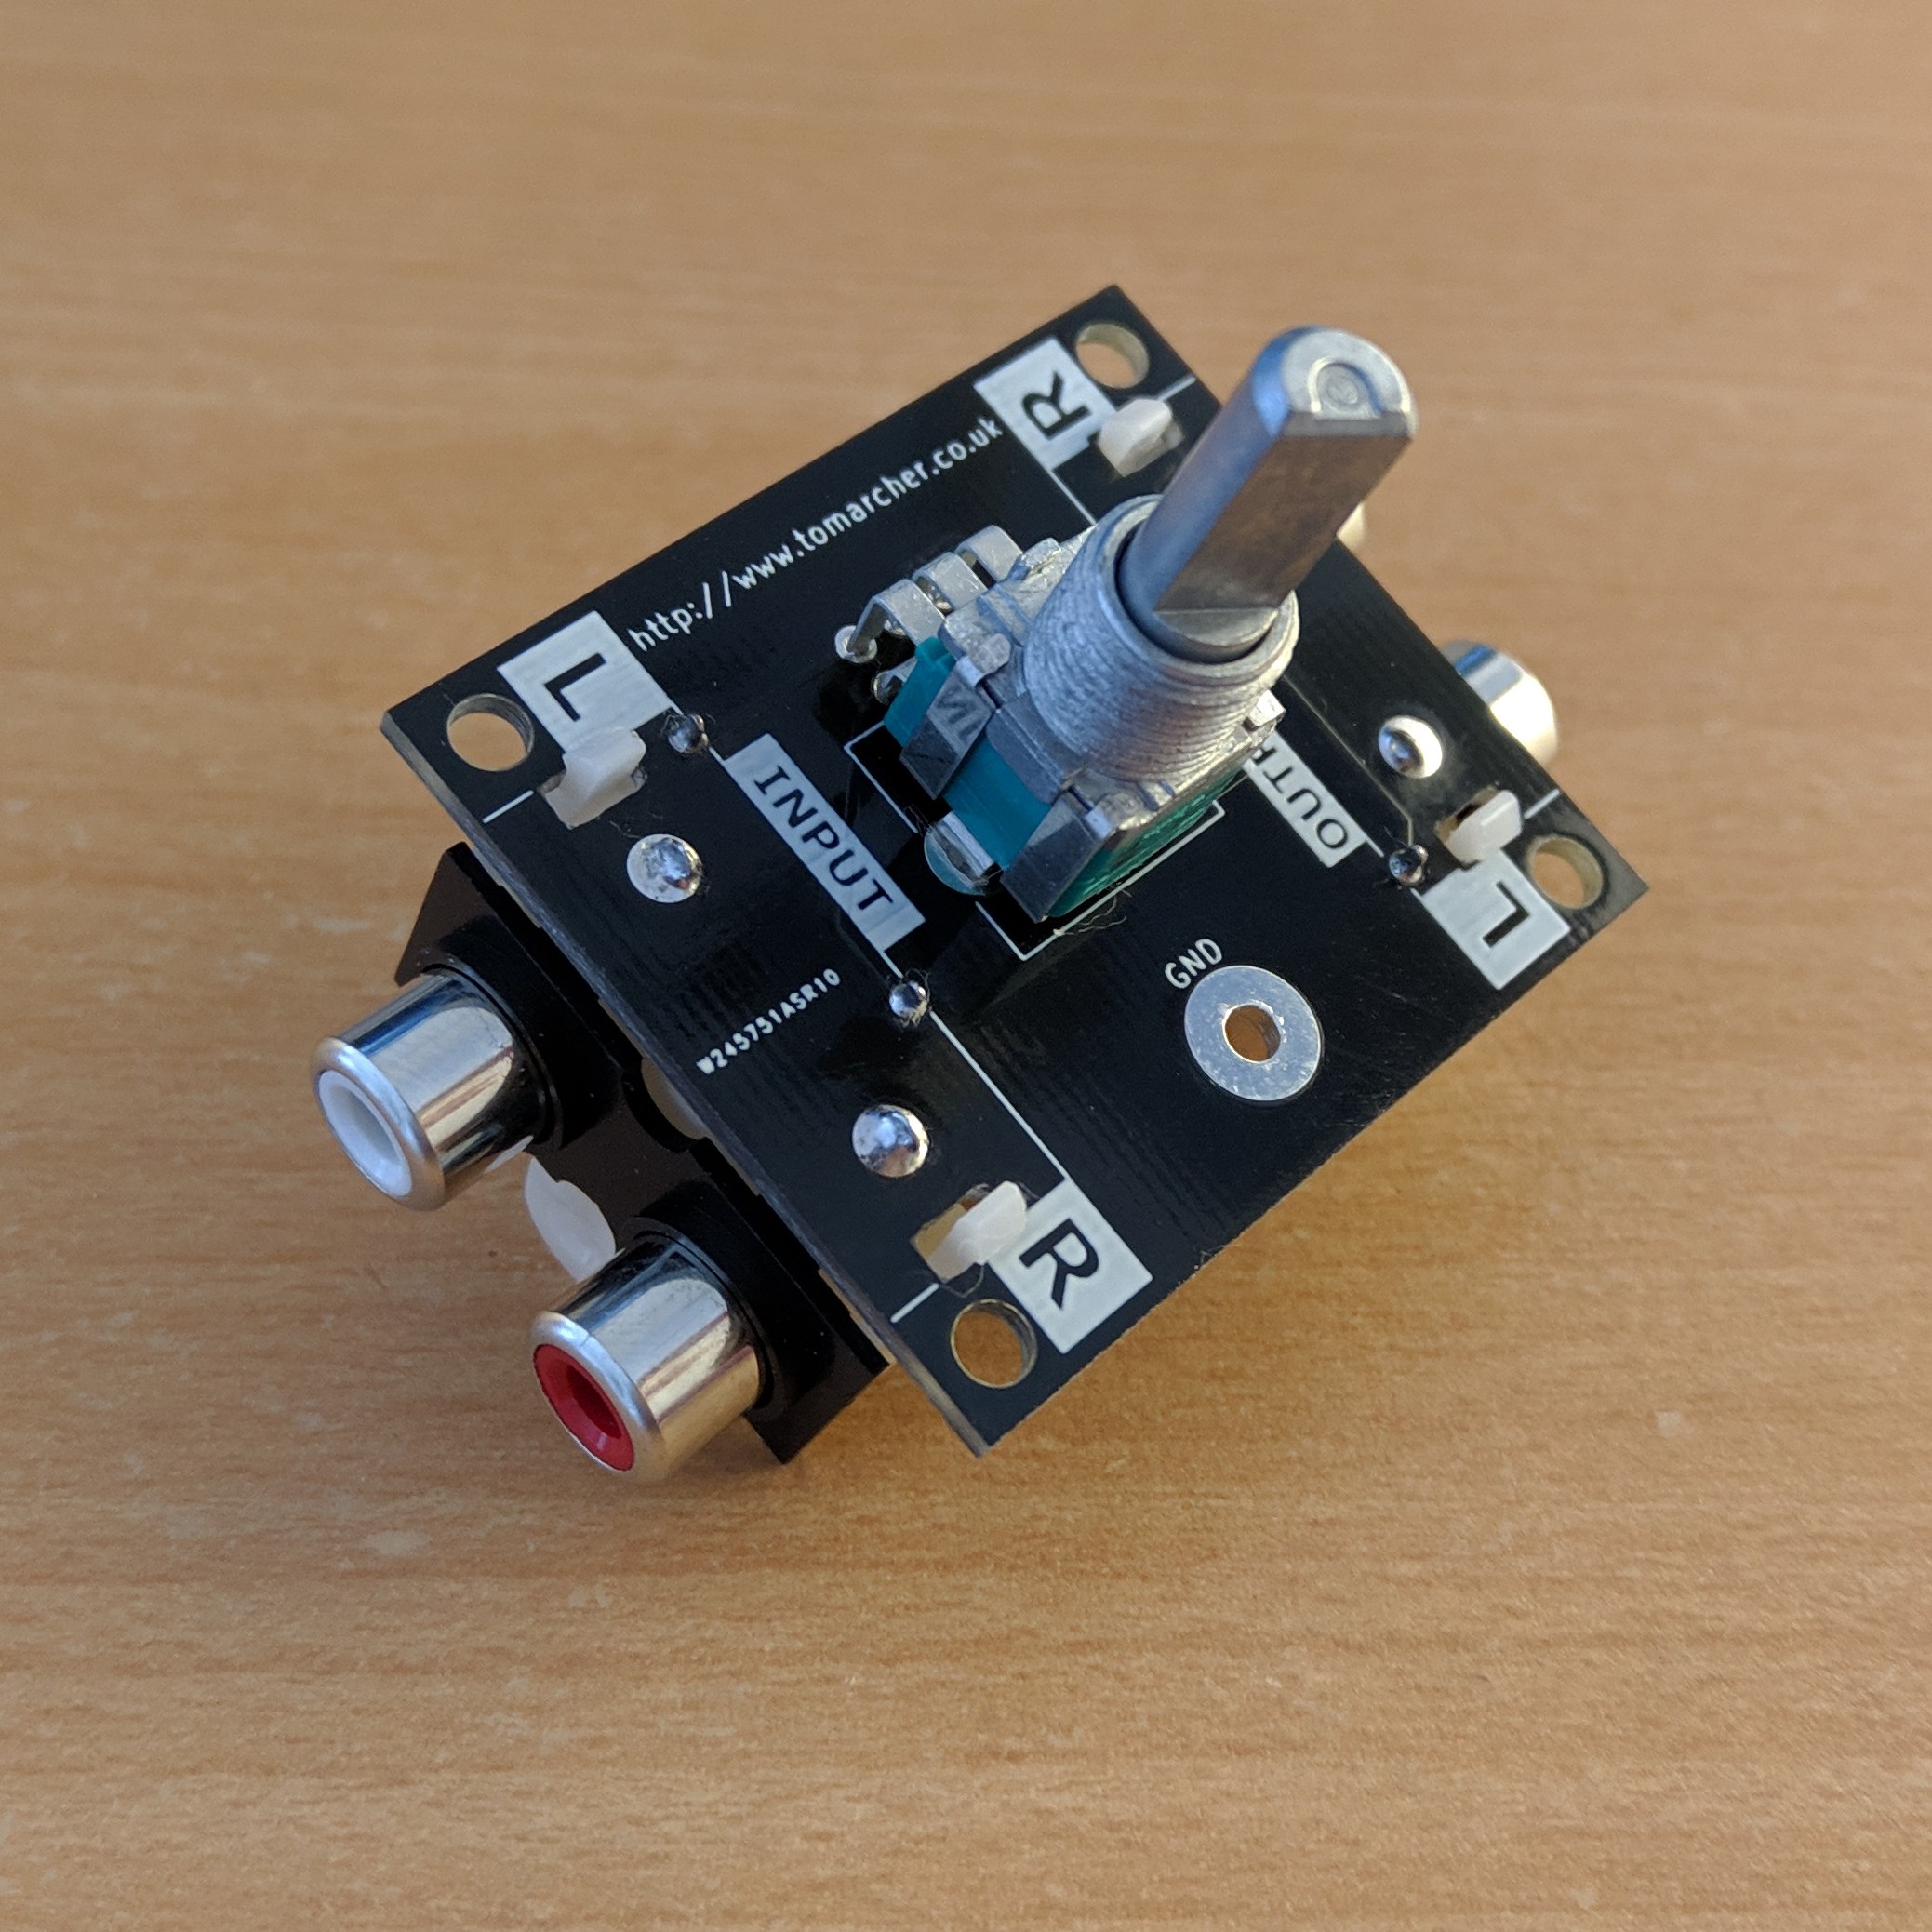
Here’s the whole board assembled. A fairly quick soldering job with the PanaVise. The plastic lugs on the RCA jacks were a little tight, which is probably a side-effect of me creating the footprint from my own measurements. It sits at quite a pleasing angle of its own accord, so I may revisit my enclosure design.
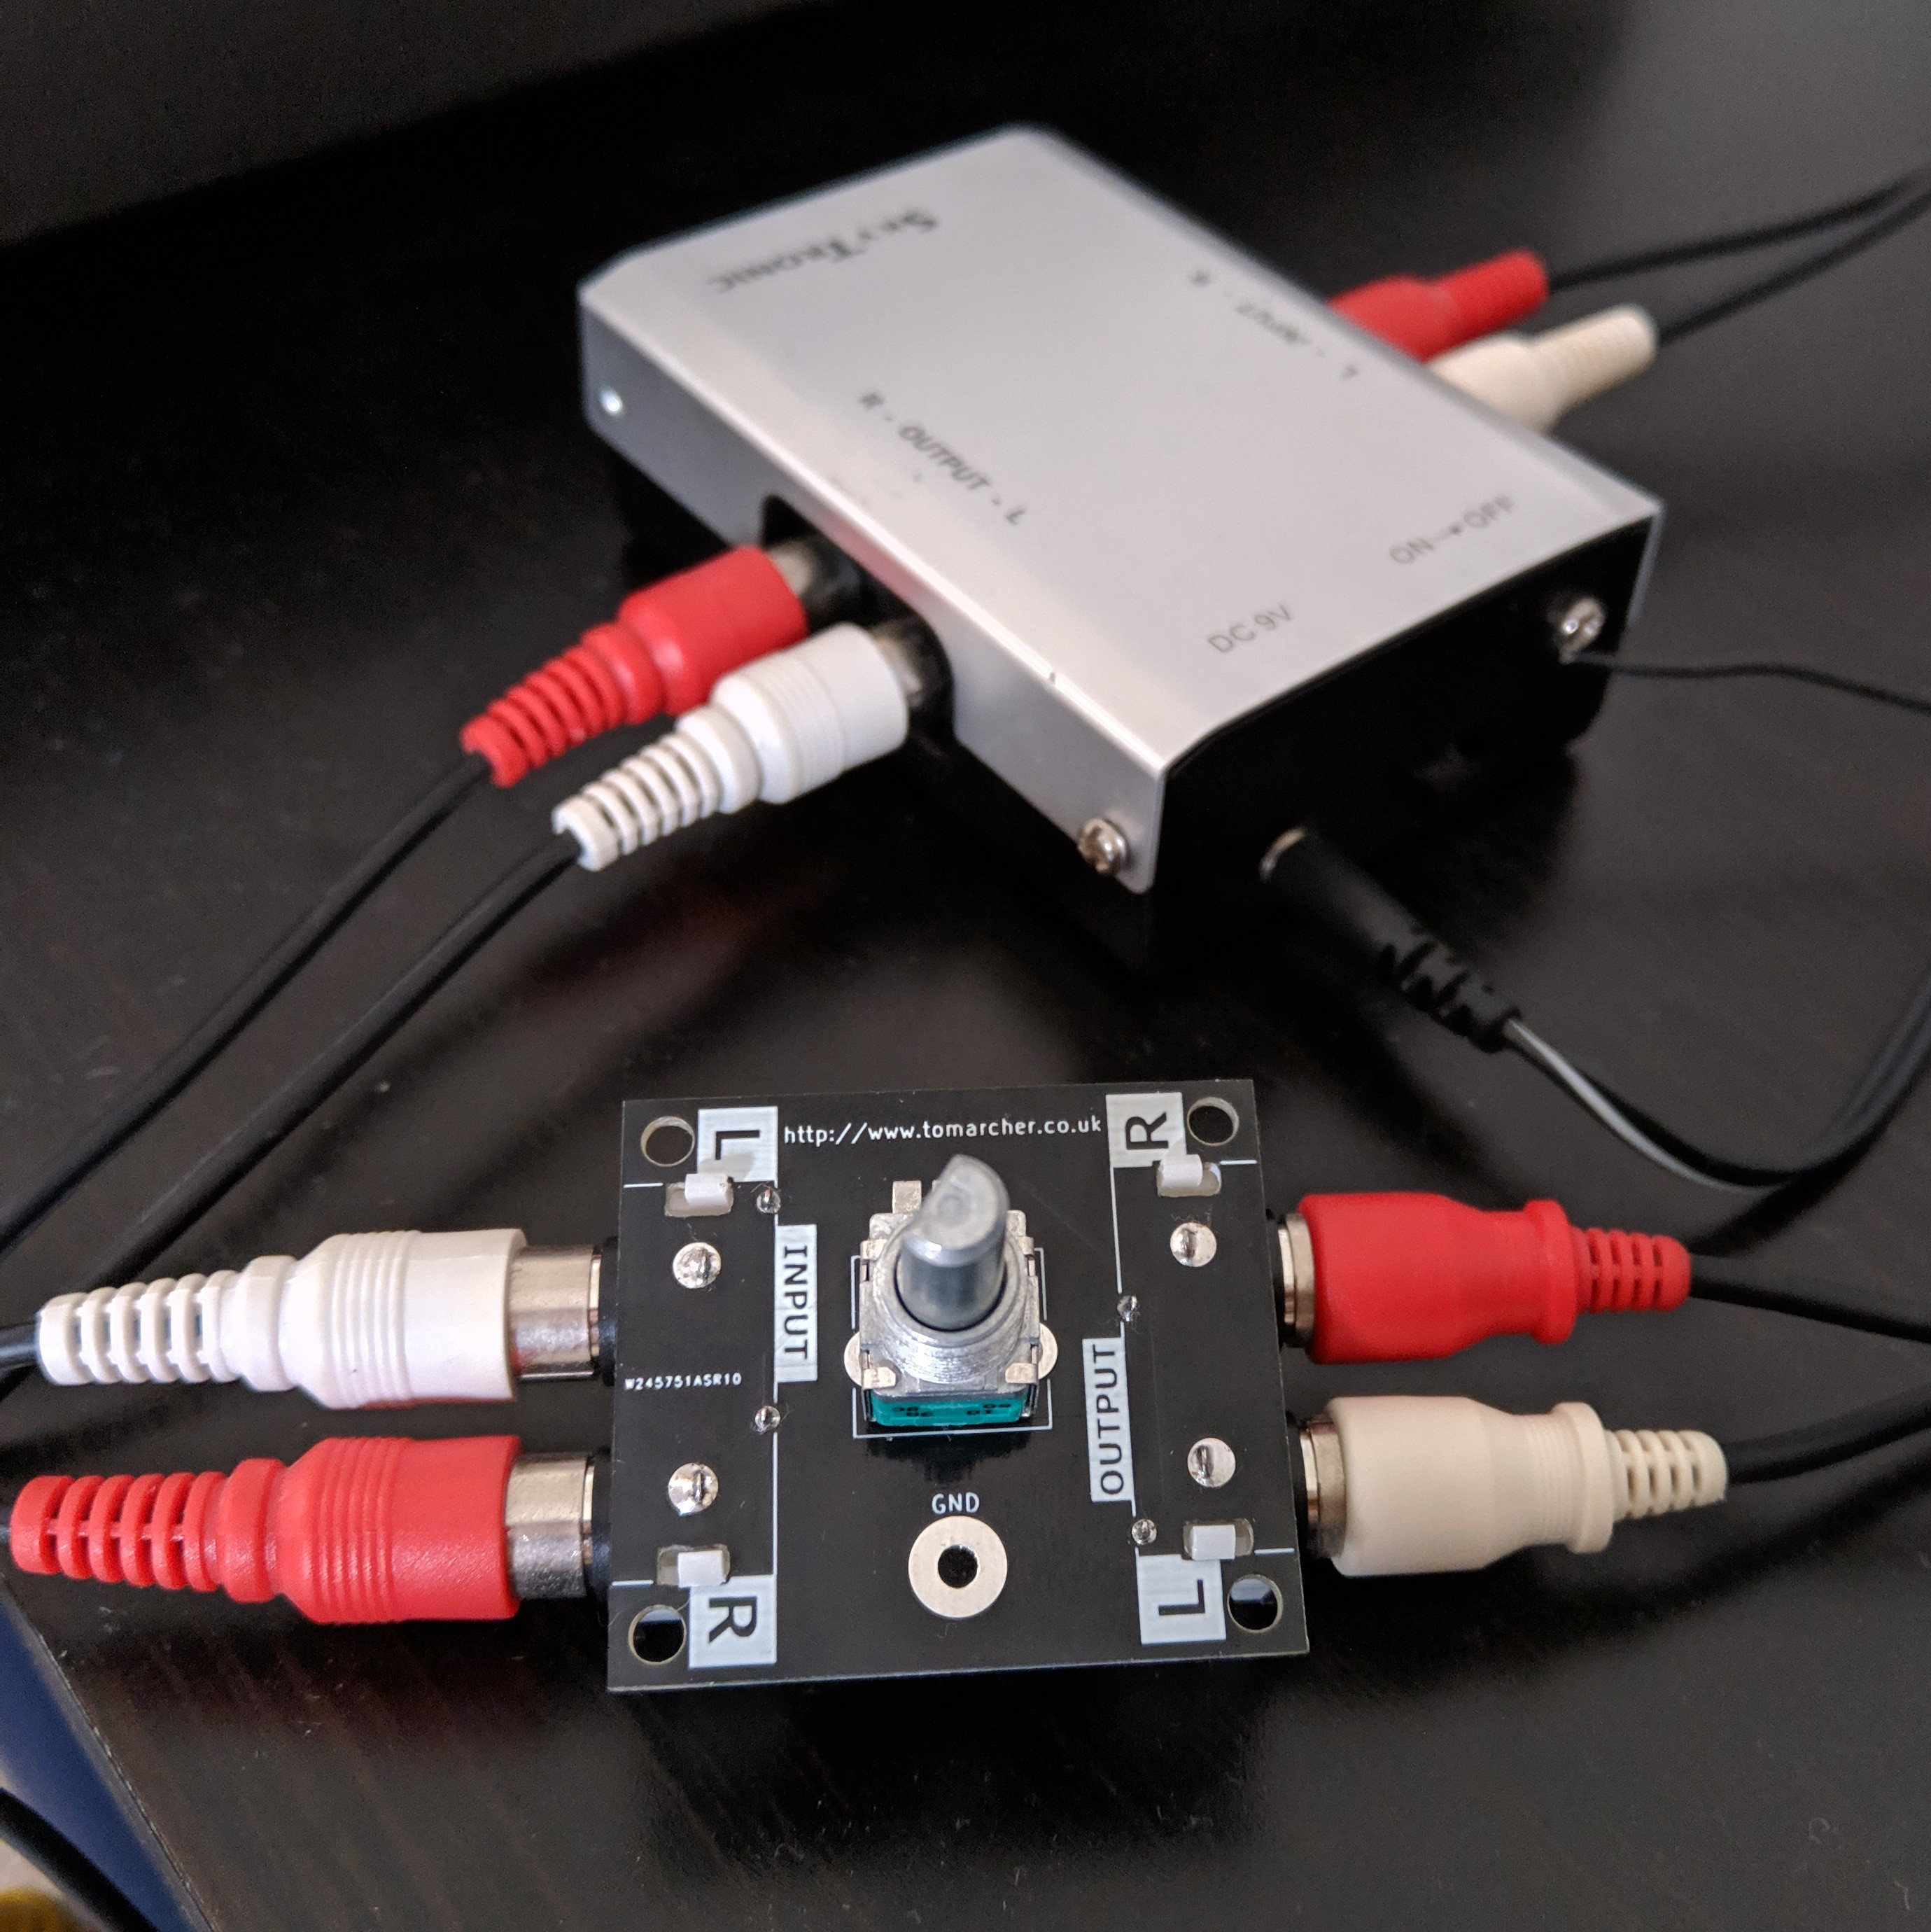
After all this I was a bit nervous about whether this would actually work or just introduce an unacceptable level of noise to the signal. I’m happy to say it works really well and have a good amount of control over the volume. It’s great to be able to take a project from concept to completion in a fortnight.
I’ve set the pot to about a third of its (logarithmic) range and that’s more than adequate.
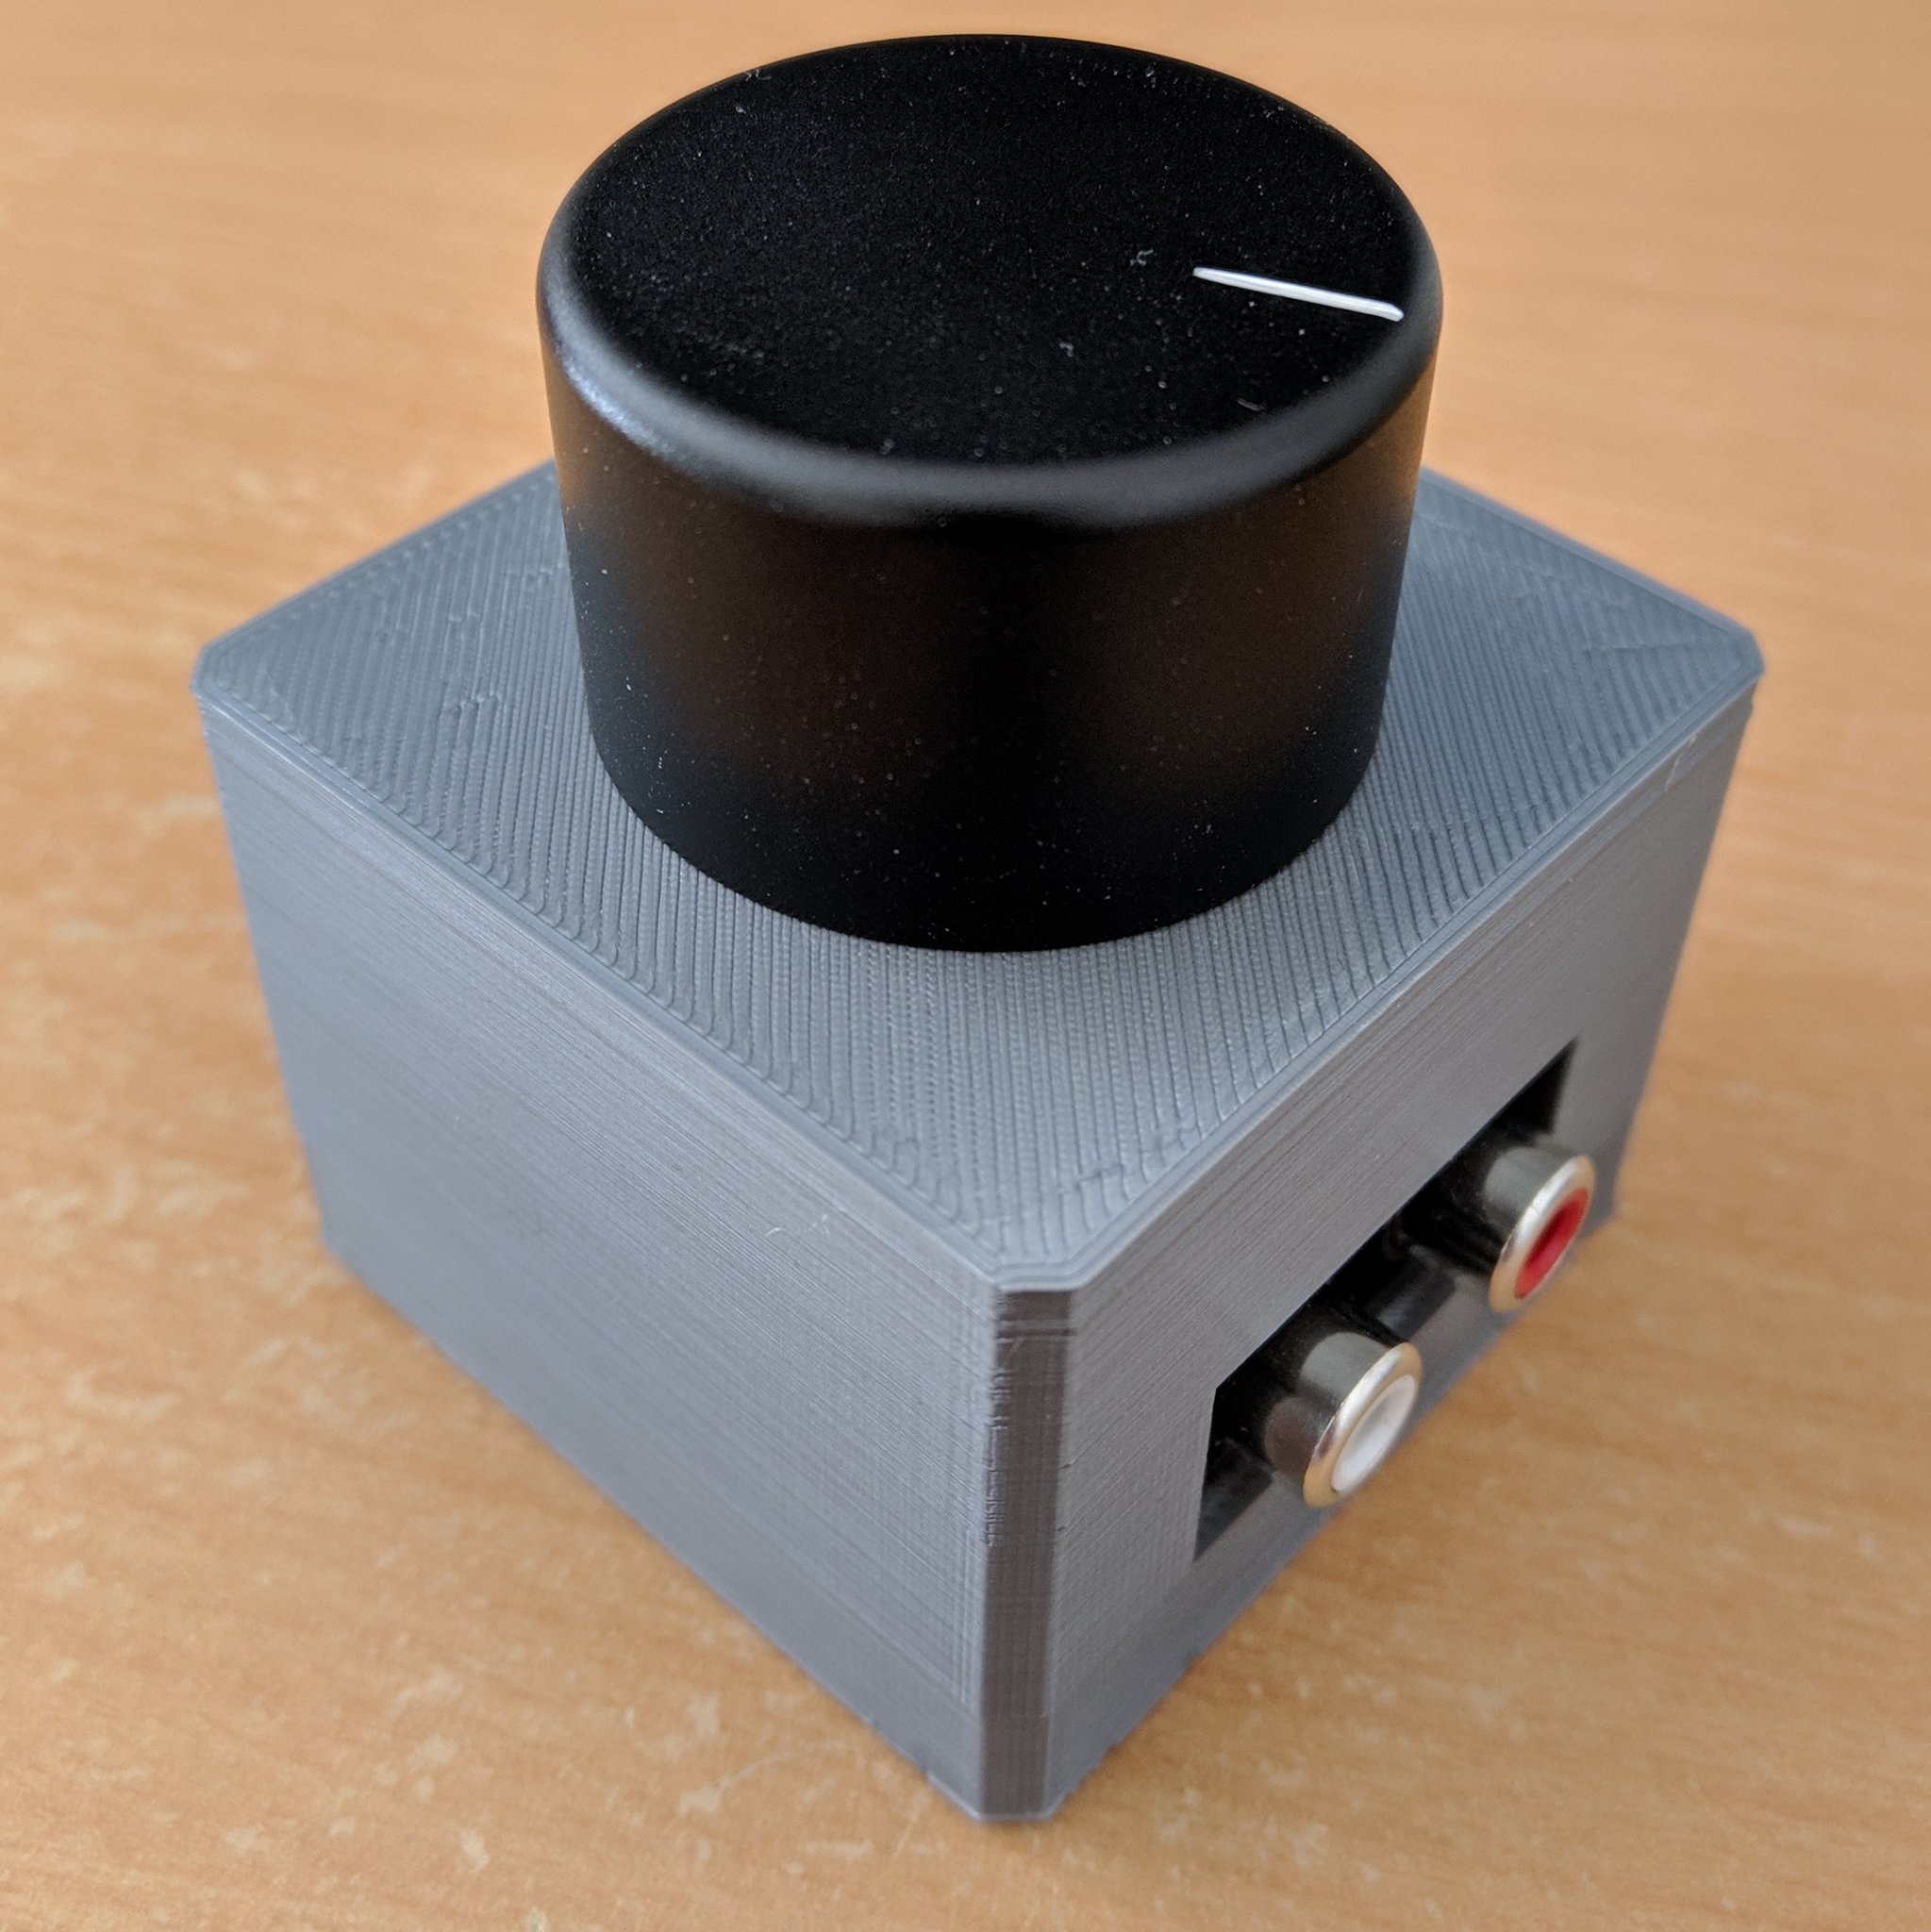
I ordered a heavy, aluminium knob from China and it turned up surprisingly quickly. It looks lovely.
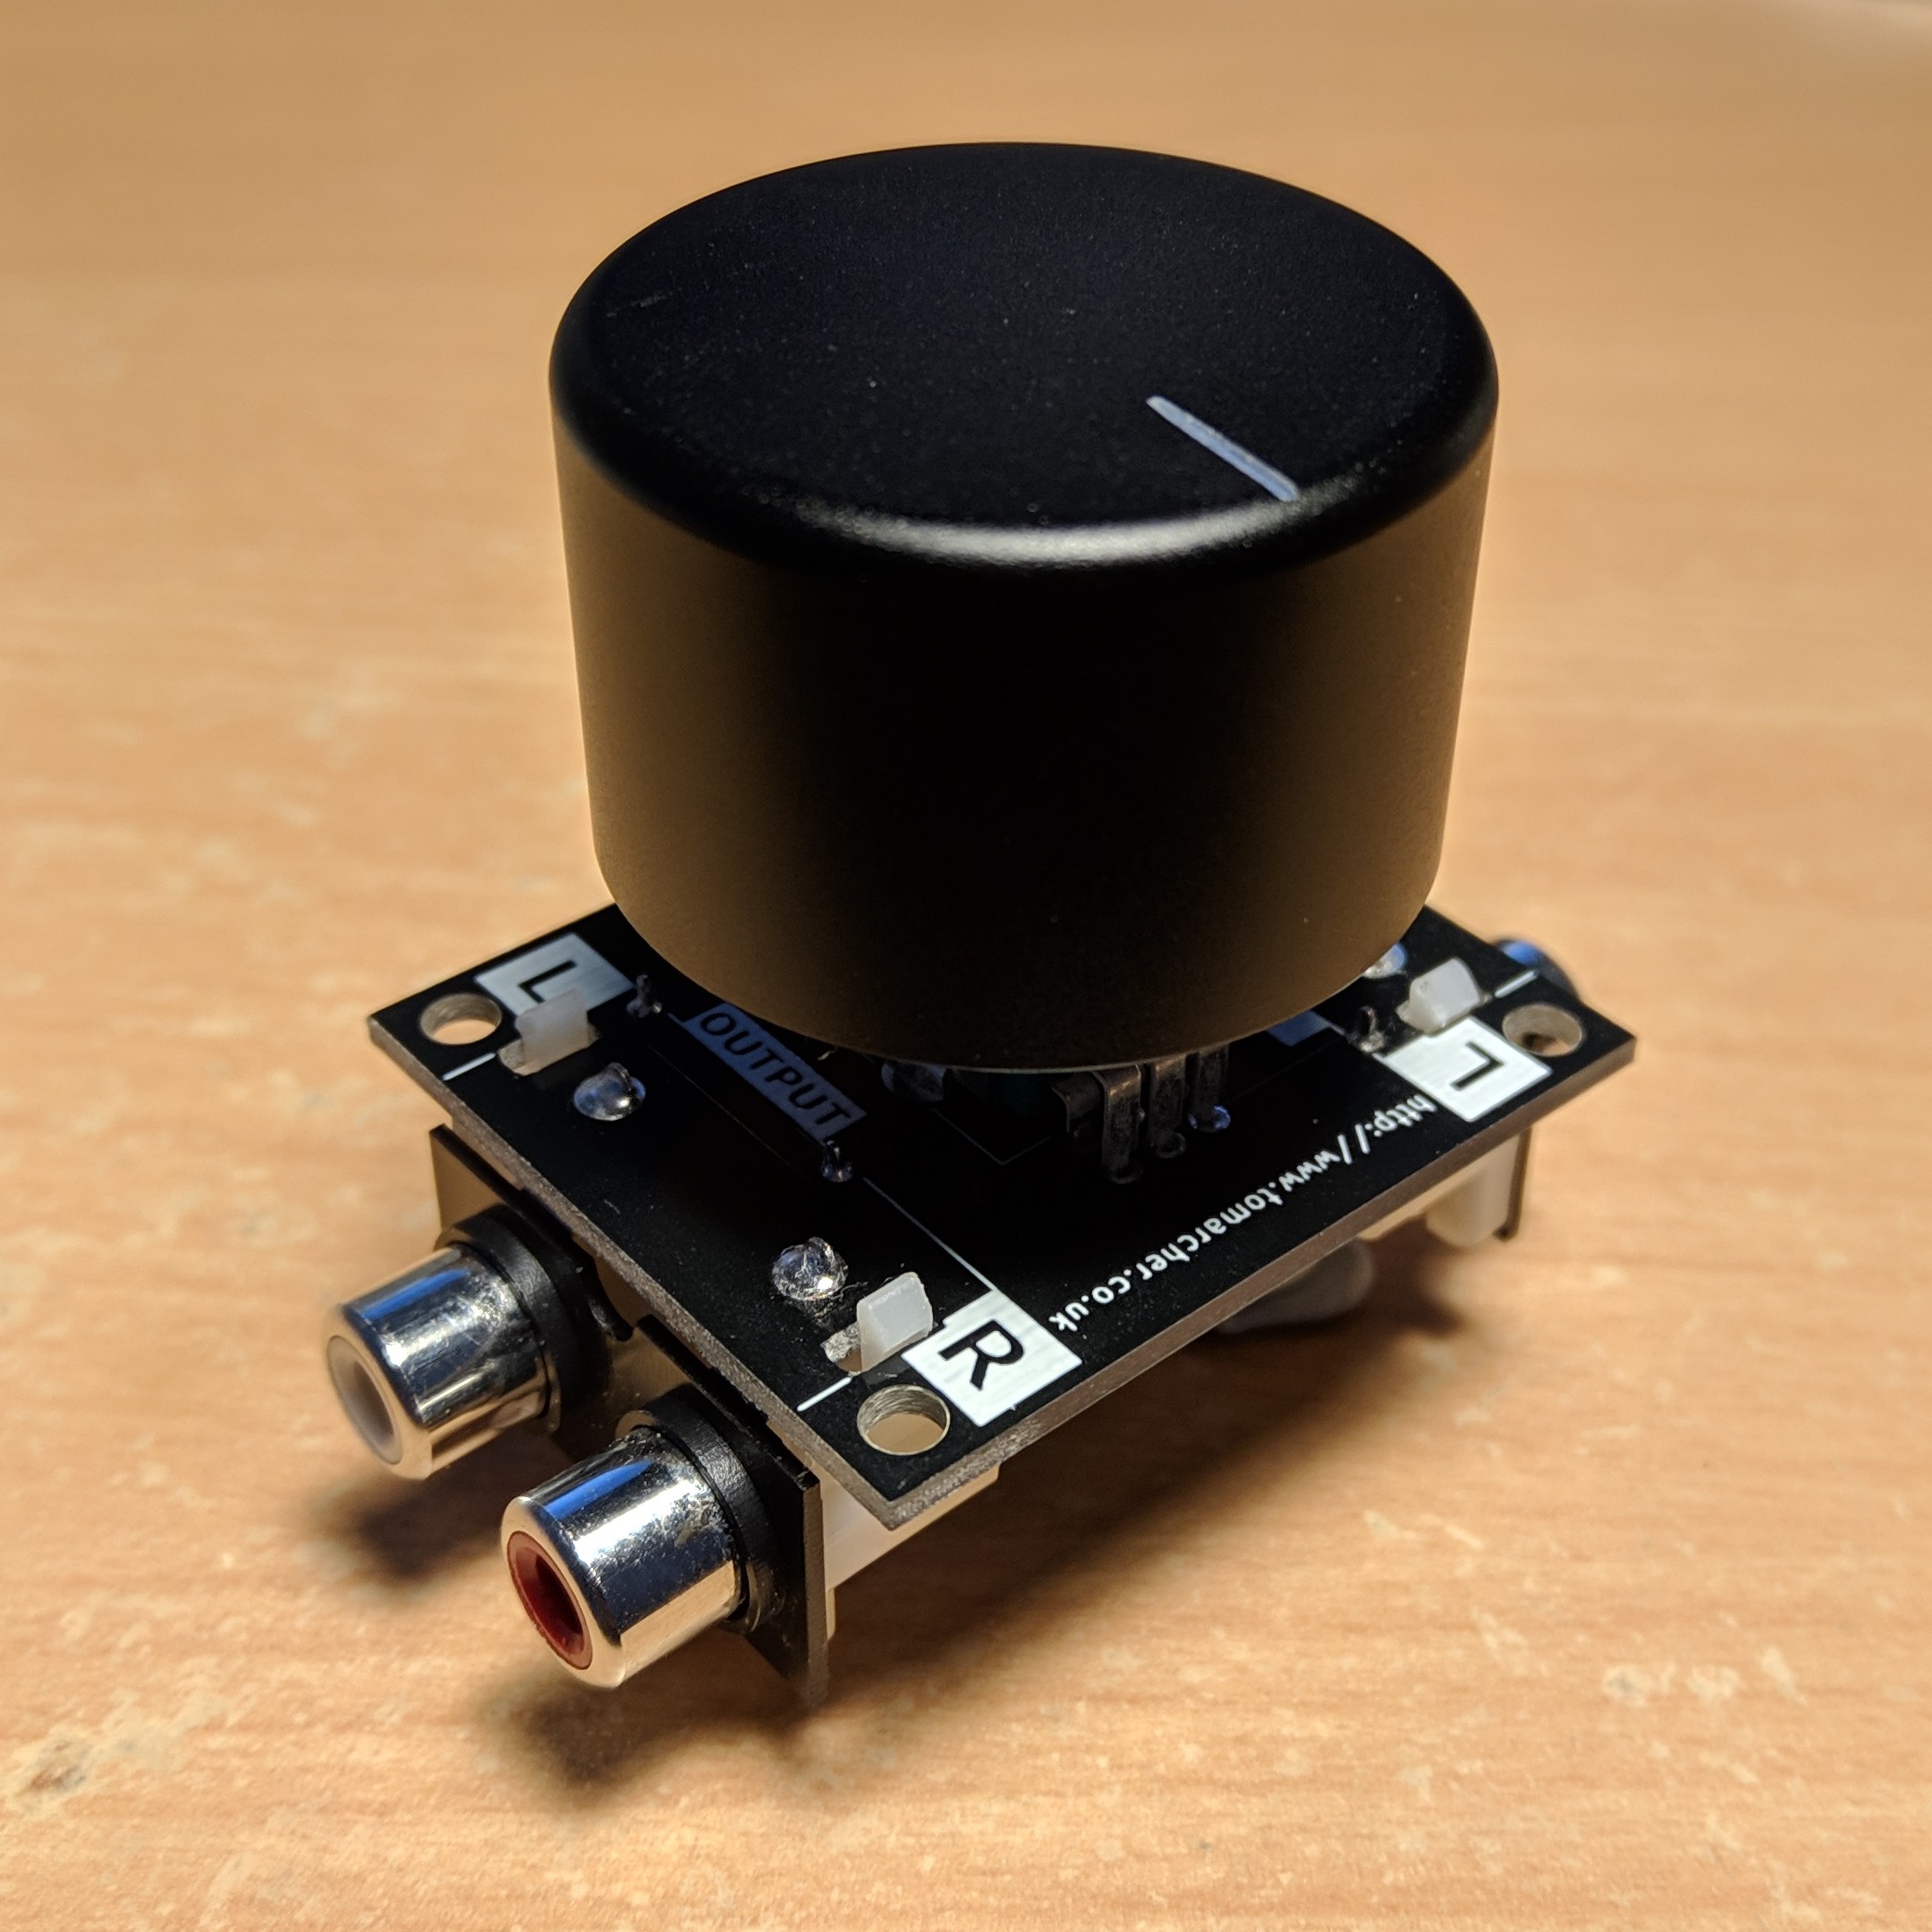
It’s a bit top heavy now so I set about printing the enclosure I designed earlier. I was only intending this to be a test print, but it turned out so well that I don’t need to print another.
Now I’m off to listen to some LPs without bothering the neighbours.
BOM
| Part | Quantity | Cost |
|---|---|---|
| PCB | 1 | £1.70 |
| Potentiometer | 1 | £1.66 |
| RCA/Phono Jack | 2 | £1.27 |
| £5.90 |