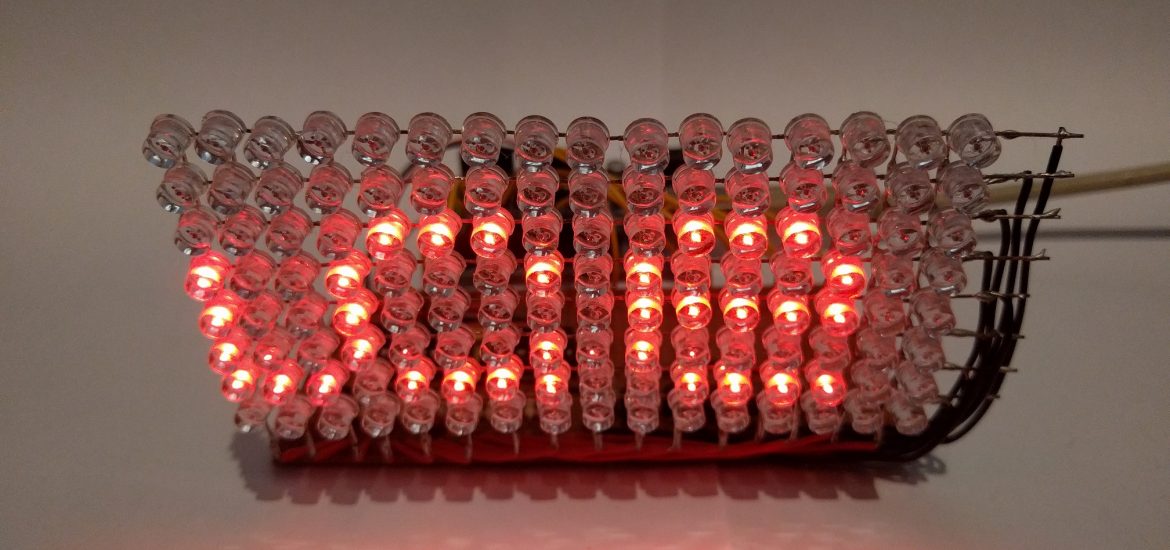
This post is a sort of eulogy. About 5 years ago I decided to teach myself a little more about electronics and thought building an LED matrix from scratch would be a good idea. Not just any old LED matrix, a 16×8 LED matrix. That’s 128 individual LEDs along with a whole bunch of resistors, transistors and a couple of shift registers for good measure.
Inspired by the LEDs in Volpin Props’ Daft Punk helmet I started off by drilling a lot of holes in a piece of acrylic, this would hold the LEDs as I soldered the legs together. Using a jig I frabricated from some card, I set about bending the anodes and cathodes of the LEDs so that they were perpendicular to each other. A lot of soldering later and I had my matrix.
The LED anodes are connected in columns and the cathodes connected in rows to ground, so turn a single LED on, it’s a case of supplying 5V to one of the columns using an Arduino pin and connecting the appropriate row to ground. Now, instead of connecting each of the columns to a pin on the Arduino, I used two shift registers. This configuration allows addressing of a particular column, using only 3 wires.
At the opposite end, we use transistors as electrically controlled switches to connect the rows to ground as necessary. This also avoids the current from the LEDs flowing back into the Arduino pin and damaging it. A single shift register could have been used here, but I opted to just wire directly into the Arduino.
Here’s a schematic showing how it’s all connected:
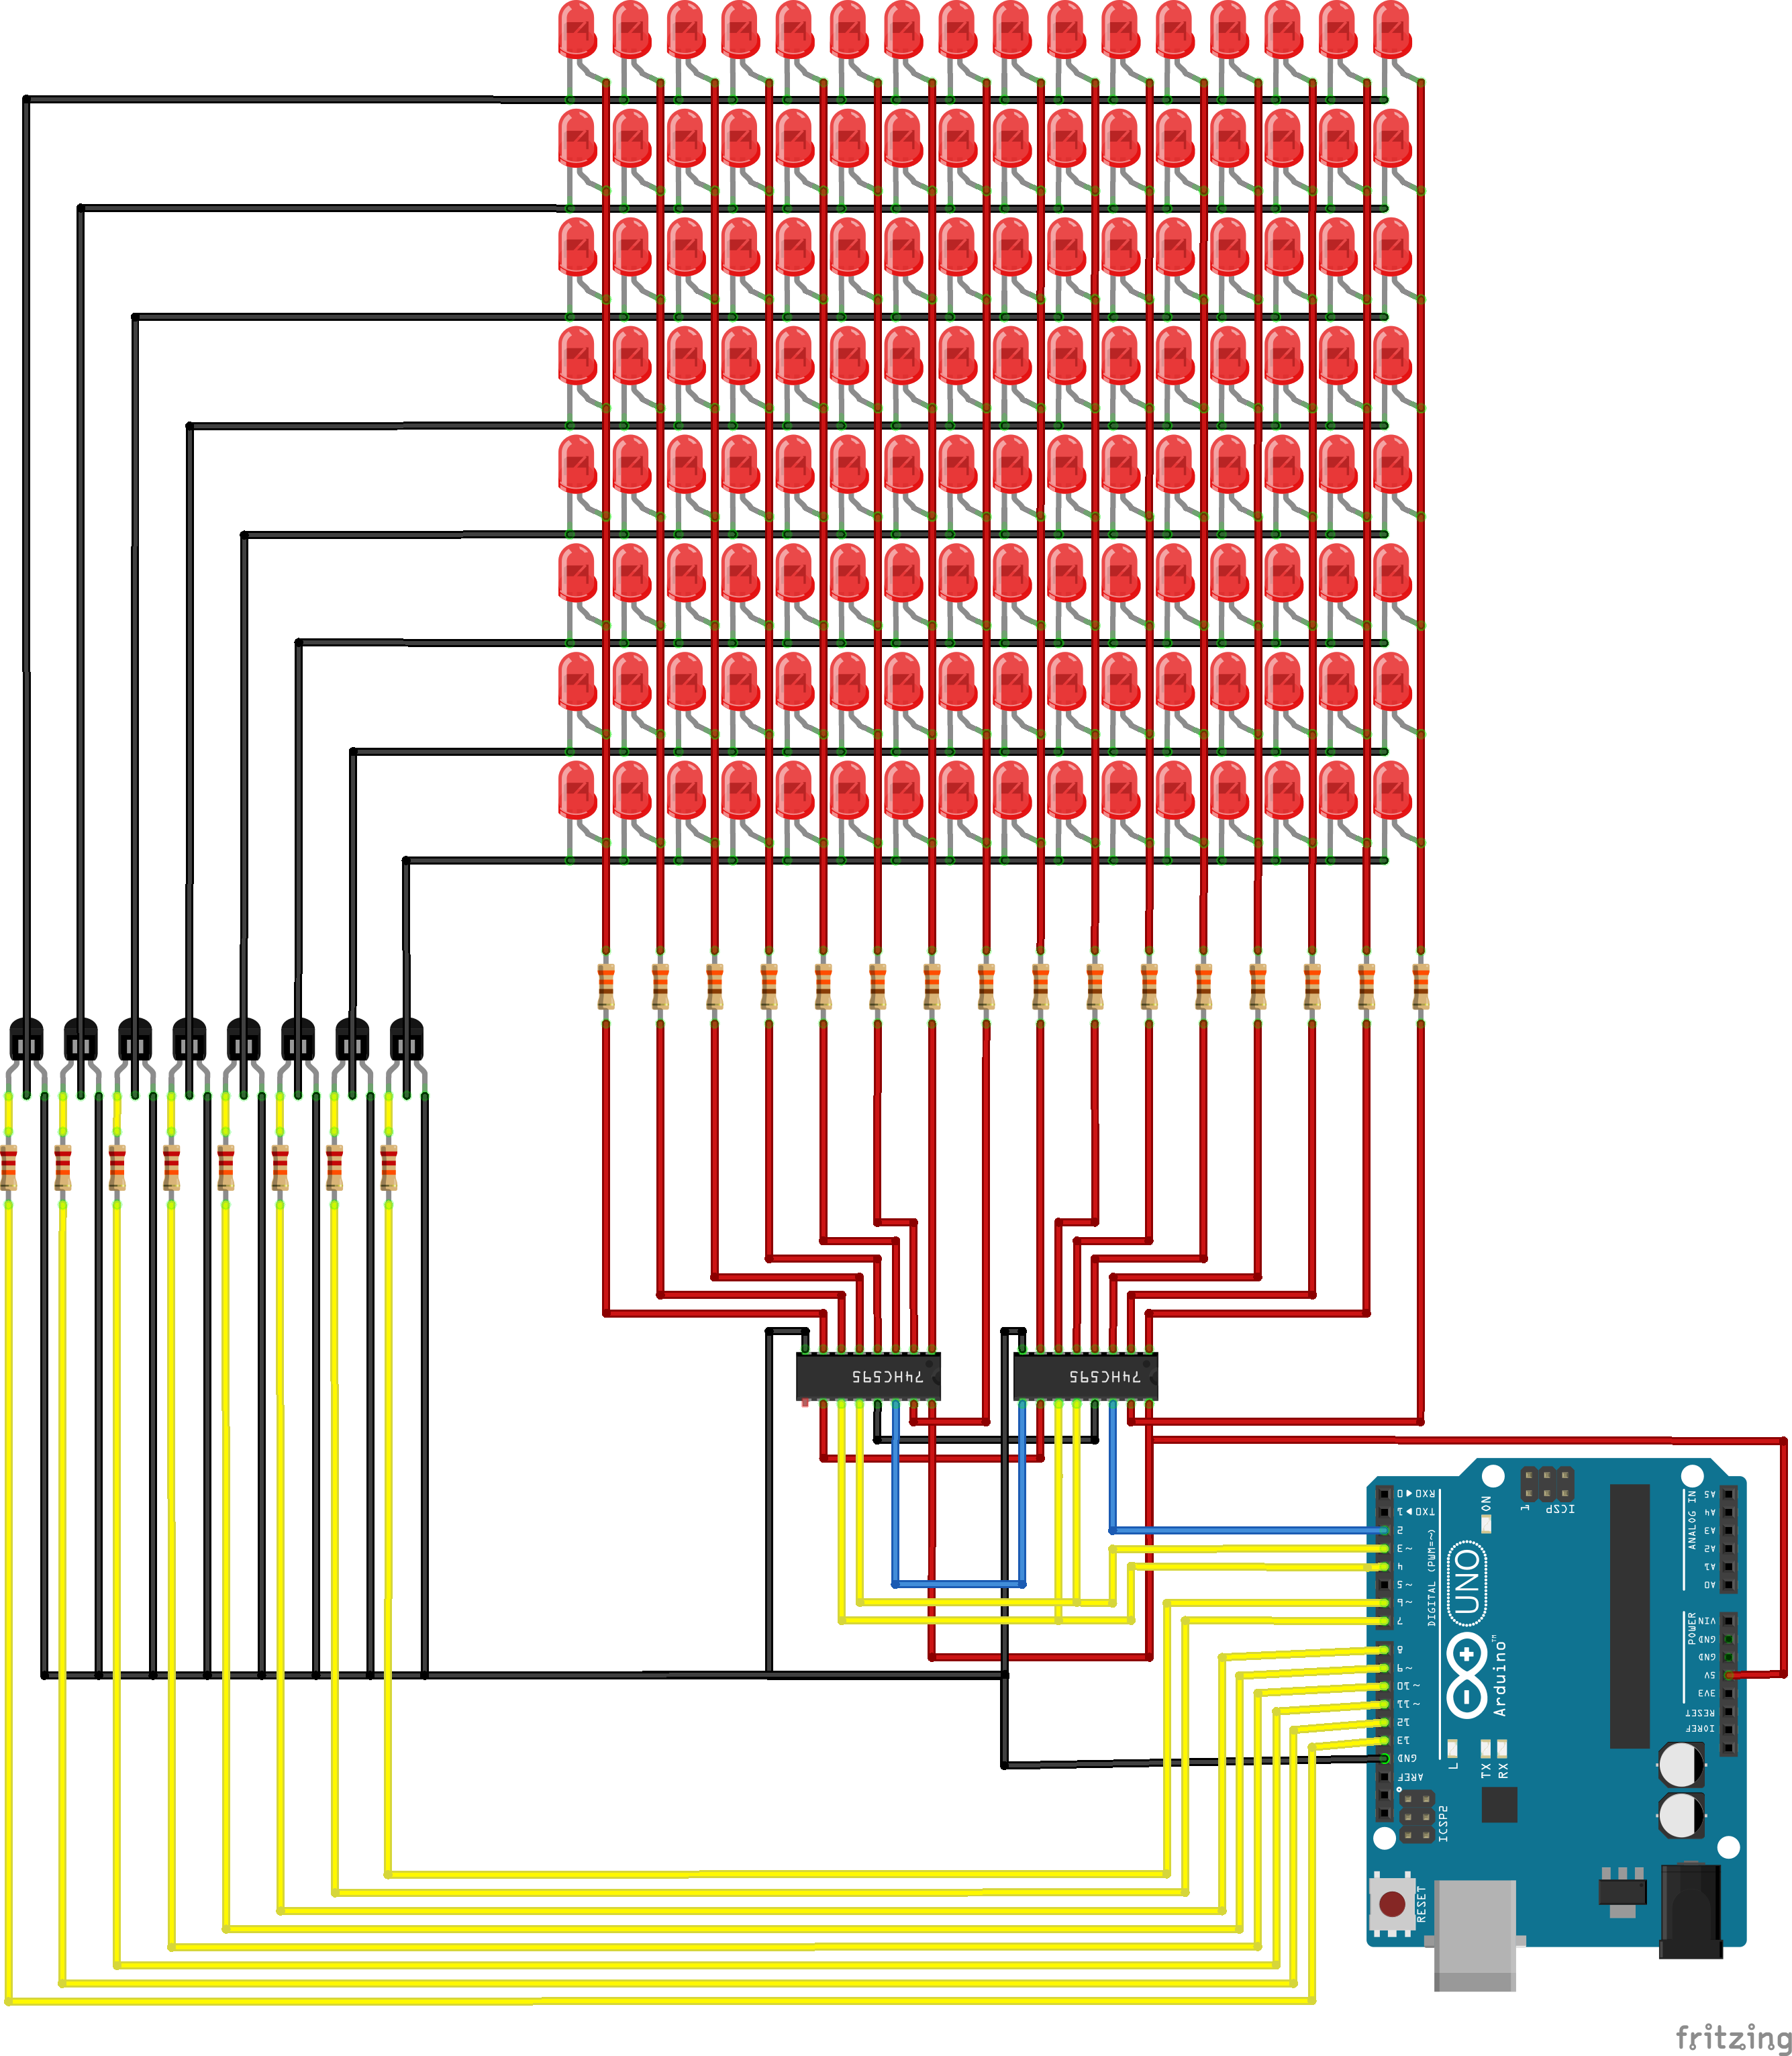
The wiring around the shift registers looks a little confusing, but all I’ve done is chain the two of them together to form a 16bit shift register out of the two individual 8bit registers.
Next I set about getting it to display something pretty. Turning individual LEDs on and off was simple enough but I really wanted to get it scrolling text across the matrix. After spending a lot of time designing an 8×5 pixel alphabet to fit nicely on the display, I wrote some code take text from the serial port and scroll it across the LEDs. (See my GitHub repository for the Arduino sketch.)
Unfortunately the shift registers can’t deal with all 128 LEDs being turned on at once so this is where we get clever. By turning each row on in turn for a fraction of a second, we give the illusion that all rows are illuminated simultaneously.
Here’s a video of it in action:
And after 5 years of use, being taken to no end of shows and talks it is showing his age. Quite often when turning it on LEDs fail to illuminate due to bad or broken connections, so I think it’s time to retire the old boy. Maybe I’ll build a new one and incorporate a little 3D printing?