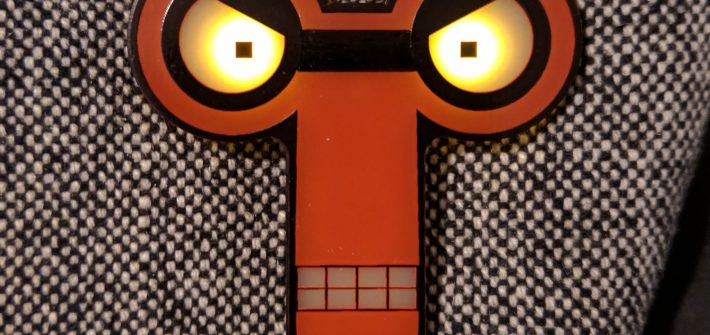
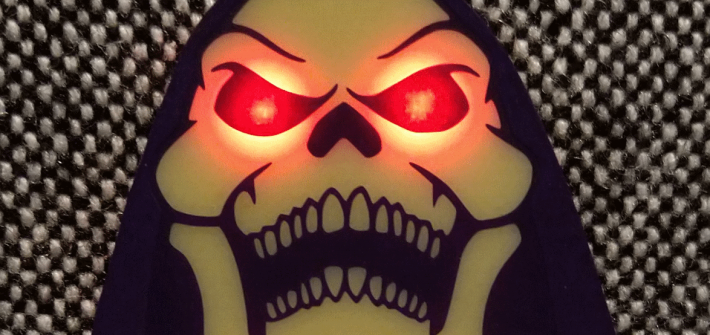
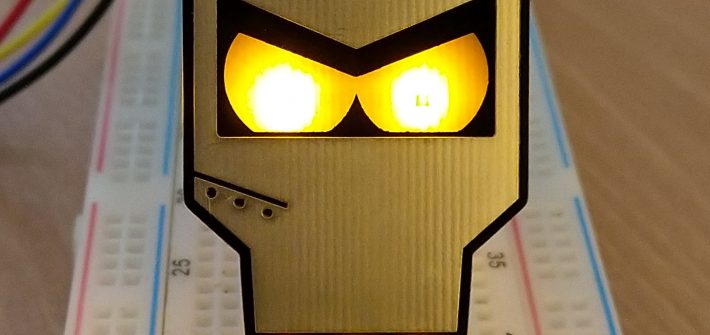
Having the Perturbator and Meeple pin badges under my belt, it was finally time to try something a little bit more complicated.
Inspired by Day of the Geek badge that I own, I thought I’d try a memorable robot from Futurama: Francis X. Clampazzo.
Having the Perturbator and Meeple pin badges under my belt, it was finally time to try something a little bit more complicated.
Inspired by Day of the Geek badge that I own, I thought I’d try a memorable robot from Futurama: Francis X. Clampazzo.
Over Christmas I stumbled across a cute Meeple lapel pin, which I of course bought. While it works well as a tie pin, I’d like something a little closer to the real Meeple size for my coat, so as soon as I got back to my PC I had to try my hand at making a PCB version.
Since the first post I’ve ended up tinkering with the code for this project every night.
Some notable additions:
Confession, in moments of inspiration I tend to buy electronics kit and then end up leaving it unused for ages. I’ve had a Pimoroni Mote kit and a Raspberry Pi Zero W sitting around for some time now, and whilst I originally intended to mount the LEDs in my PC case, I eventually decided to add some much need lighting to my Ikea Kallax bookshelf. Rather than settle for a static display I decided to completely over-engineer this project and make them controllable over the LAN.
Here’s a plugin I’ve been working on this weekend that integrates Google Music with the Google AIY Voice Kit. Simply speaking, “play playlist” will stream the playlist from your Google Music account and display the current track artist & title on the display.
So Google recently released their first AIY project on the cover of the MagPi magazine. The kit itself allows you to add voice interaction to your Raspberry Pi and in typical Google fashion it came with a cardboard case to keep all the bits in. Well that was the plan, but unfortunately my kit didn’t come with the case. Nevermind, I have access to a 3D printer! (more…)
This is the second part of a series investigating the use of optical sensors for robot odometry.
In part one of this project I pulled apart an old Microsoft Intellimouse for the optical chip and managed to extract some readings using an Arduino Uno. The aim now is to repackage those components in a way that they could be mounted underneath a small wheeled robot. (more…)
For the last few years I’ve taken part in the local Rampaging Chariots competition along with a group of graduates. One of our most recent challenges has been to get a rover to autonomously navigate the assigned assault course. So lately I’ve been thinking a lot about odometry, that is, estimating the position of a robot over time. Typically, a cheap method of tracking the position of a rover is by attaching rotary encoders to the output shaft of the drive wheels. Unfortunately as the traction of the drive wheels isn’t perfect, they will slip occasionally and introduce errors into the estimated position.
So I finally decided on an Adafruit Pro Trinket to replace the Arduino Uno hanging off the back of my new LED Matrix.